Lesson 8 - Build your own BLE Robot for under $AUD40
Use your Chrome browser on Mac, Android or ChromeBook, the LightBlue App for iOS or Android or the WebBLE app on iPad to test these pages.
Lesson 6 - Real world data at your fingertips: Light, Ultrasonic Motion and more...
Lesson 7 - Build your own BLE ultrasonic motion detector for under $AUD30
Lesson 8 - Build your own BLE Robot for under $AUD40
STEM on a Budget (2)
|

ESSENTIALS:
Arduino Nano
Arduino Uno R3
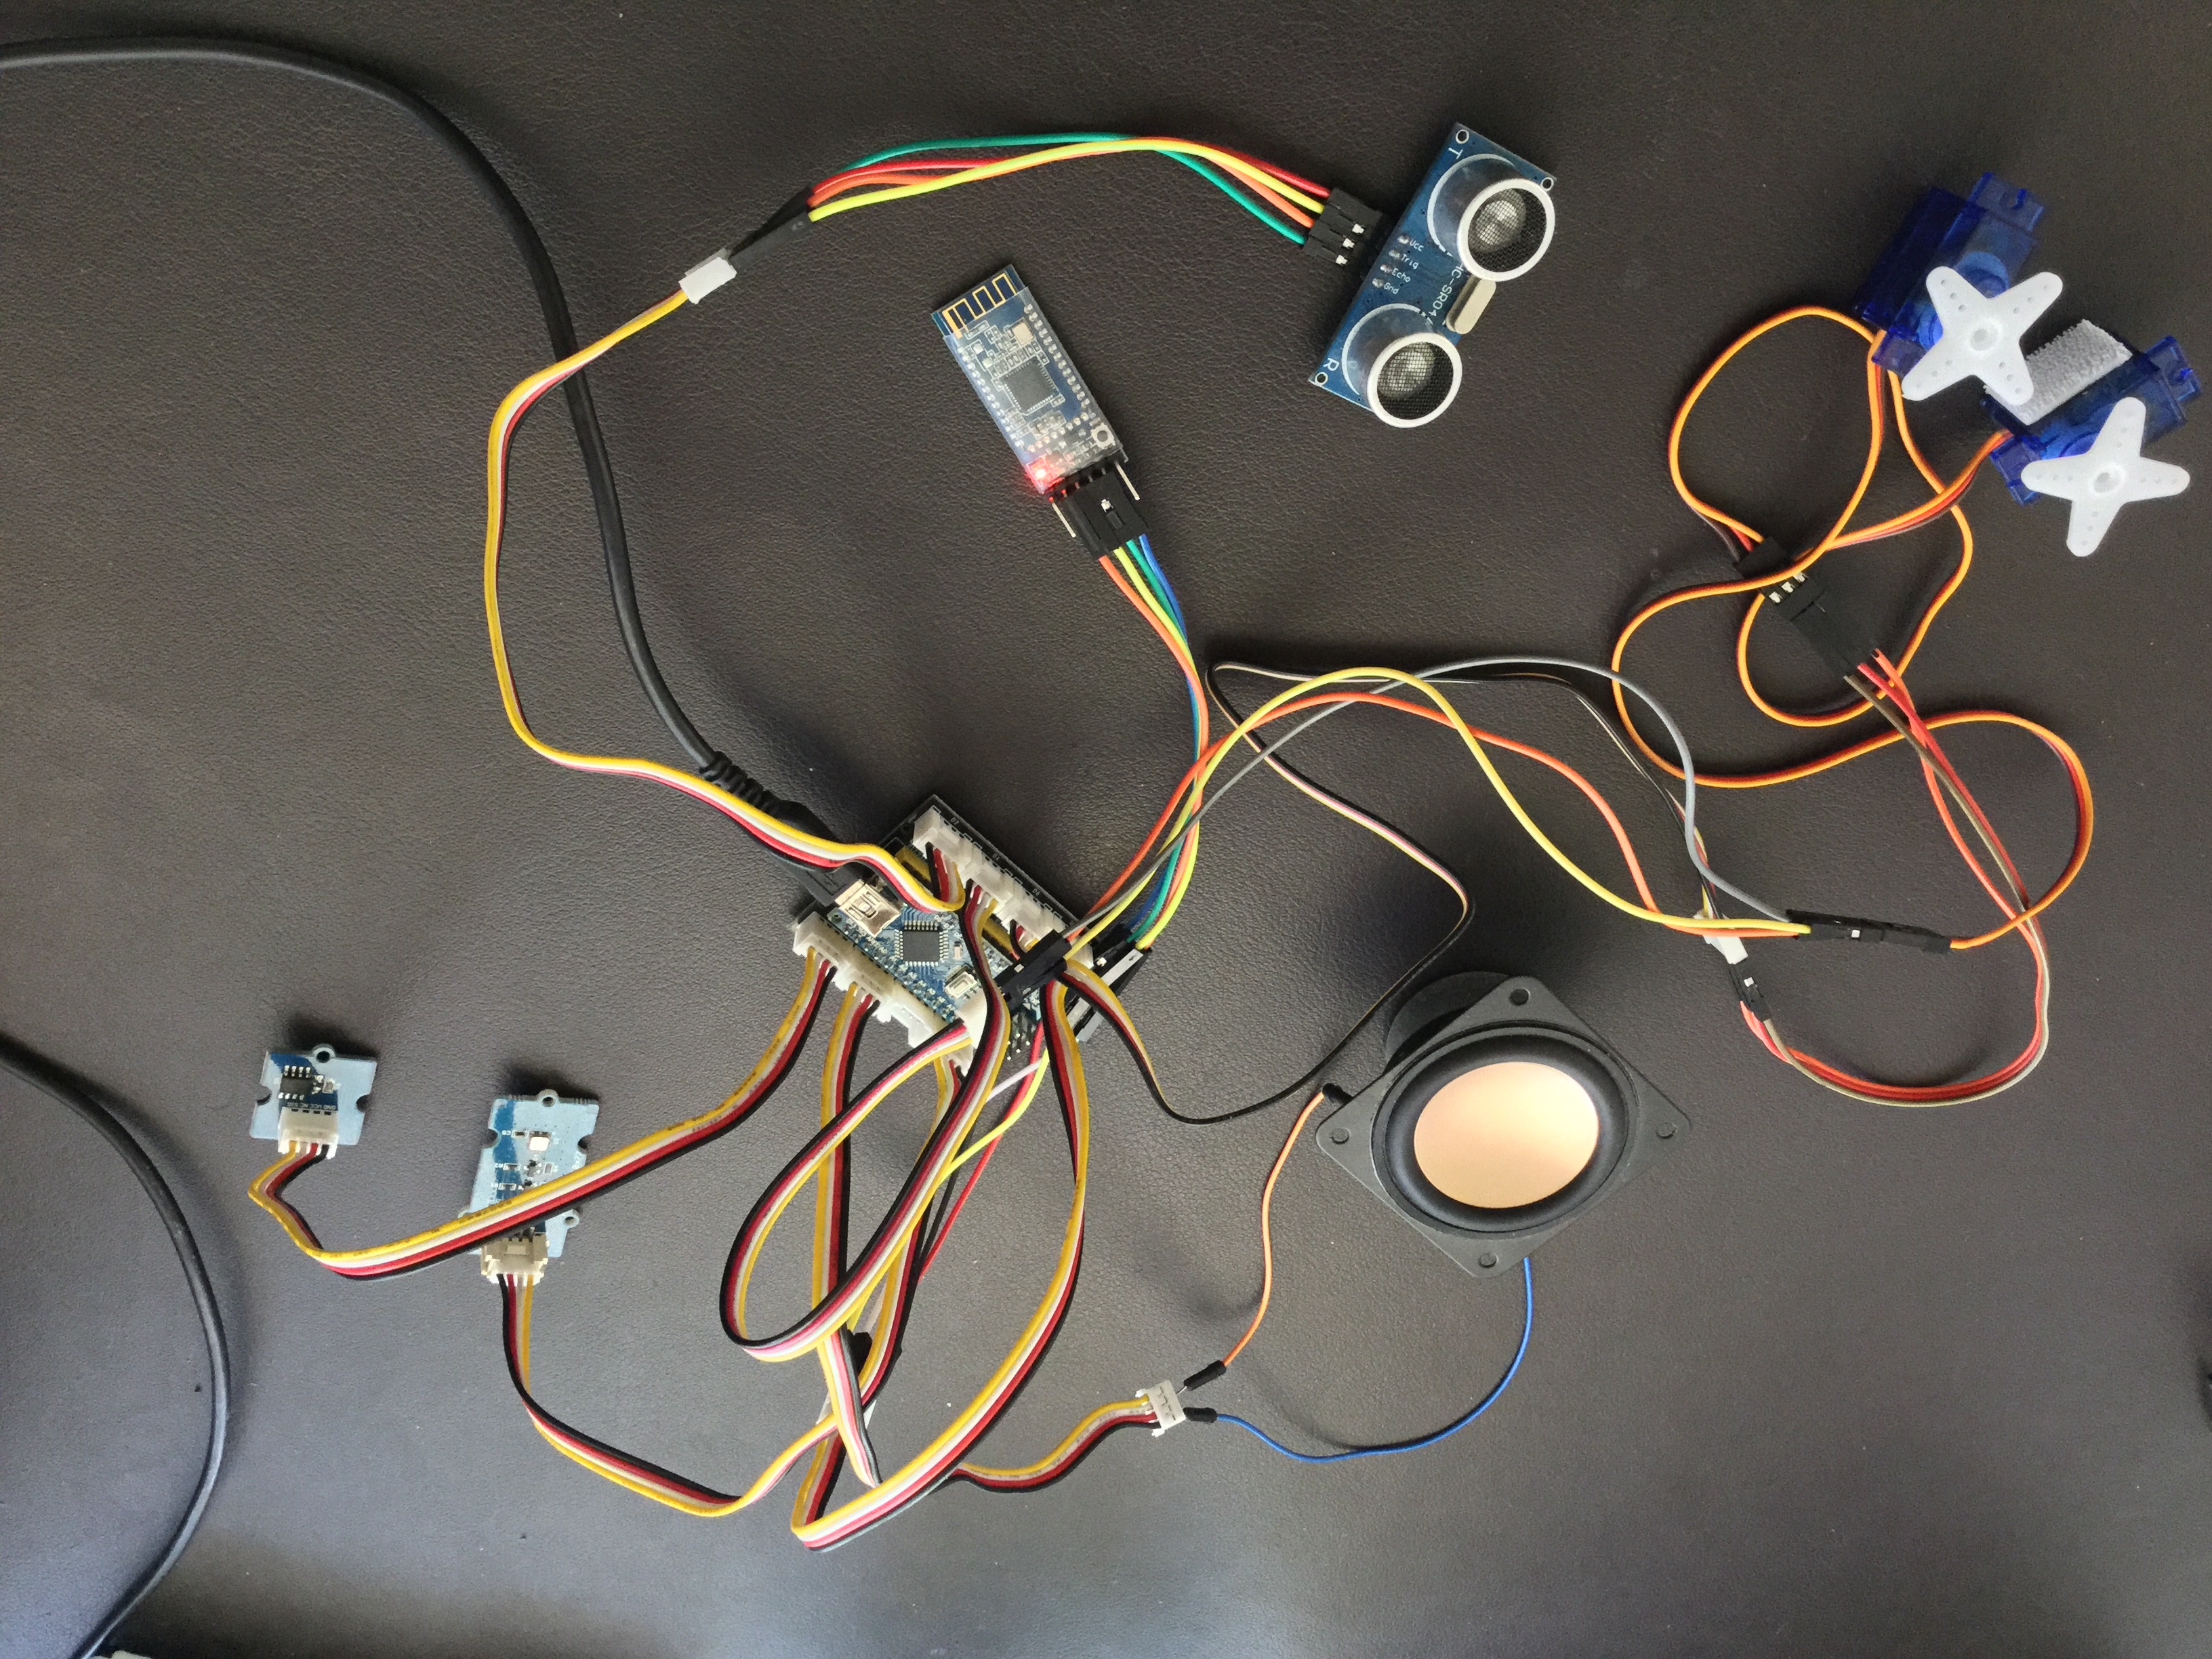
Two servo motors - I used Feetech FS90R micro continuous rotation servo from eBay and paid around $AUD6 each (total around $USD10) - NOTE: NOT the identical-looking Feetech FS90 which will NOT work for our purposes!
Generic HM-10 BLE module (under $USD5)
You will also need a light-weight power source.

I found a great 2500 mAh power bank on eBay for $AUD15! (even less if you shop around!)
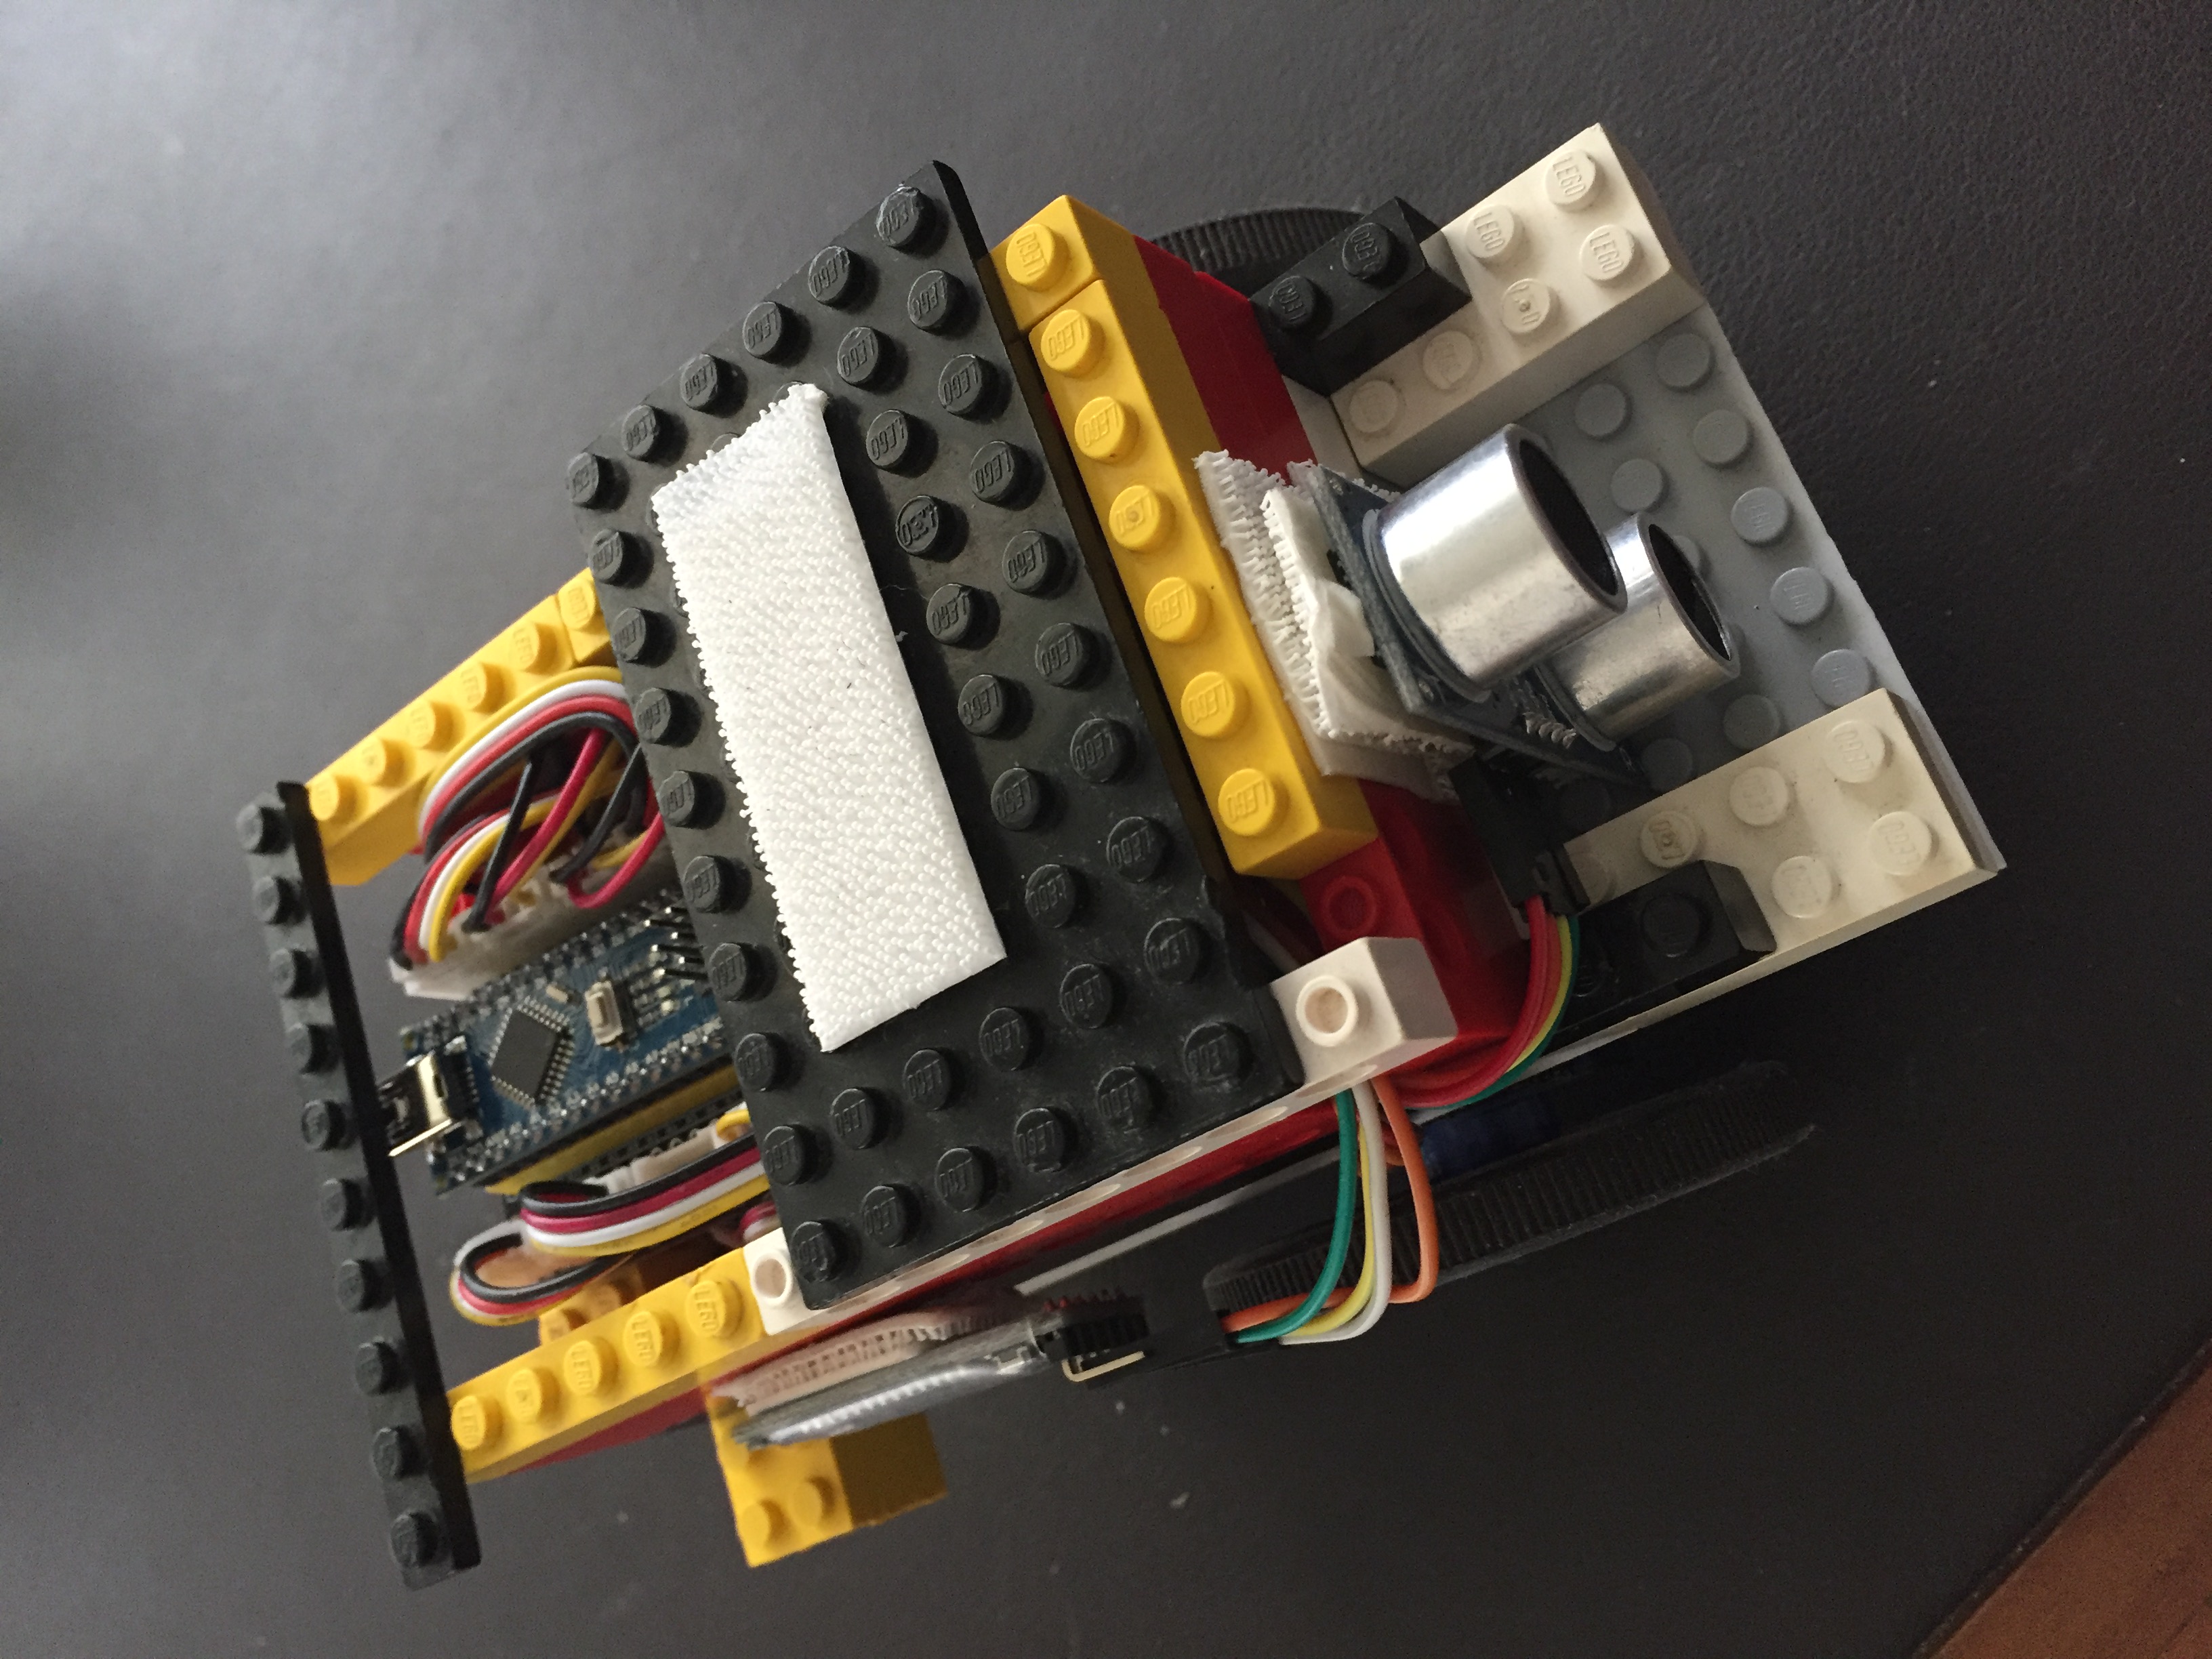
The form factor is ideal for our robot - it actually sits neatly above or beneath the board.
NOTE: The Nano is powered from a MINI-USB port. i found a lovely $AUD1 female micro-usb to male mini-usb adaptor which works perfectly with my lightweight power bank!
Nice add-ons
Generic HC-SR04 ultrasonic motion sensor (under $USD5)
I used a Grove speaker but any small speaker will be fine (and much less expensive: under $USD5)
Pololu wheels are designed specifically for the FeeTech FS90R servo motor.
Refer to the previous lessons for connection instructions for the BLE module and the ultrasonic distance module. The speaker can be run from any spare pin, along with a ground (GND) and a voltage (VCC) pin.
Arduino boards come with several voltage pins, both 3.3V and 5V. The only module here which really insisted on 5V was the HCSR04 ultrasonic. The servos expect 5V but will run (a little more slowly) on 3.3V.
WARNING: My first servo purchase from eBay delivered some lovely black heavy-duty motors that actually drew too much current for the board to handle when connected to 5V - I started to smell burning and quickly disconnected. After some cautious experimentation, I found that these actually did work just fine from 3.3V instead of 5V. My recommendation, though, is for the lighter less hungry FS90R servos shown above.
If using the blue Feetech FS90R servos, then feel free to connect to one (but not both!) of the 5V pins; if trying another servo, be careful - but my experience has been that 3.3V is probably a safer choice.
The best option (if not the simplest) is to run the servos from an external battery. Use either a 9 volt "transistor" (D-type) battery or a 4-pack battery case. Either way, you will have a positive (red) and a negative (ground, black) lead. Using a breadboard (or even part of a breadboard), connect the red (positive) lead on the same line as the red (voltage) leads from your servos. The black ground lead needs to be connected to a ground pin on your board, along with the black/ground leads from the servos, connected to other ground pins. Connect the other (signal) leads from the servos to the appropriate pins on your board, and you now have a circuit which runs through your board but with no risk of frying it!
The FS90R comes with three leads - brown, red and orange. Brown is ground (normally black), red (as usual) is voltage, and orange goes to the pin assigned to that servo in your sketch. There are numerous servo types available, and they can behave quite differently - some, for example, take inputs for speed, others for angle of turn. The simple form we use here are just responding to forward and reverse speed instructions.
Arduino Sketch: Simple Two Servo controls (Copy and paste into Arduino IDE)
#include <Wire.h> #include <Servo.h>
Servo servoLeft; Servo servoRight; int servoLeftPin = 5; // D5 int servoRightPin = 7; // D7 int pos = 0;
void setup() {
}Serial.begin(9600);
// delay(1000); // Serial.println("AT"); // just a check // delay(2000); // Serial.println("AT+ROLE0"); // set up as Slave // delay(2000); // wait a couple of seconds // Serial.println("AT+NAMEMyRobot"); // Uncomment these lines to rename your BLE module!void loop() {
}char recvChar;
if (Serial.available()){recvChar = Serial.read();}switch(recvChar){
case 'F': //(F)orward
leftForward(); rightForward(); Serial.println("forward");break;case 'B': //(B)ack
leftBack(); rightBack(); Serial.println("back");break;case 'L': //(L)eft
leftBack(); rightForward(); Serial.println("left");break;case 'R': //(R)ight
leftForward(); rightBack(); Serial.println("right");break;case 'n':
Serial.println("NIL"); servoLeft.detach(); servoRight.detach();break;}
void leftForward() {
servoLeft.attach(servoLeftPin); servoLeft.write(180-pos); Serial.print("ServoLeft: "); Serial.println(pos);}void rightForward() {
servoRight.attach(servoRightPin); servoRight.write(pos); Serial.print("ServoRight: "); Serial.println(pos);}void leftBack() {
servoLeft.attach(servoLeftPin); servoLeft.write(pos); Serial.print("ServoLeft: "); Serial.println(pos);}void rightBack() {
servoRight.attach(servoRightPin); servoRight.write(180-pos); Serial.print("ServoRight: "); Serial.println(pos);}Have a look through the sketch. There are several features thast you should note.
First, you will see that we include two standard Arduino libraries - wire and servo.
We define two servos, calling them servoLeft and servoRight. I have chosen to use pins D5 and D7 for these servos, but you are free to use others.
As usual, we define Serial (our BLE port), and use recvChar to control our robot - a single character sent to move forward, back, left or right.
NOTE that I have defined four separate functions (leftForward, leftBack, etc) which live outside the loop and setup functions. This is something new, and allows us to moake our sketch much simpler and easier to follow.
You should also note the line in setup that can be used to rename your BLE module: so instead of BT05 or CC41-A, or HMSoft, for example, your robot can be identified by name! You will need to switch the power to the board off and on again, and give it a minute or so to reset itself, but this will make your life much easier if, like me, you have several BLE devices broadcasting.
Congratulations! You now have a functional and cool BLE robot.
Based upon previous lessons, you might like to go ahead and add extra functionality to your robot - ultrasonic distance is a great way to monitor and control your device, and you have all that you need from the previous lessons to enhance your sketch to include this and other sensors, if desired.
Arduino Robot Advanced Sketch
Of course, you are encouraged to go much further, adding your own ideas and exploring new approaches. This sample sketch adds a wide variety of capabilities, including self-driving using ultrasonic distance, and the options to include, not only light and sound sensors, but BMP180 barometric pressure and temperature, and 3-axis accelerometer.
If you run into problems, or you try new things, please feel free to drop me a line and I will happily do what I can to help you to get started.
Copyright © 2016, Futomi Hatano, All rights reserved. Code licensed MIT
If you are using Chrome browser on Mac, Android or Chromebook, or the WebBLE app on iPad) you might just try this for yourself!
BLE LaunchPad Controls
Helpful Hints...
Make sure your board with BLE module and suitable sketch is powered and close by, and tap on the button above to connect. Then try the following either by typing the given commands into the input box below, or scroll down to use the buttons which will automate this process. A log of the session will be stored on the text box opposite.
- Numbers such as 110 and 220 will play these tones if a speaker is attached.
- If an HC-SR04 ultrasonic ranger is connected, then h will display the distance, and H will collect repeated samples. If a Grove Ranger is connected, then use d and/or D.
- Use l for Light Intensity and s for Sound Intensity.
- [I2C] Use p for Barometric Pressure ("p") and Temperature ("t"). and use x for 3-axis Accelerometer.
- [Robot] F (Forward), B (Back), L (Left) and R (Right). You might also use A (Auto drive).
- Use n or N to RESET.
ROBOT CONTROLS
No SensorTag? No problem!
On a mobile device, just tap the Internal Sensors button above to turn on the internal accelerometer, connect your Arduino robot, and tap the Drive Using Accelerometer button.
OR Just connect your board, tap the "Drive Using Accelerometer" button and use the acc_x and acc_y GeoGebra accelerometer sliders to control your Robot!
Create your own Live Web Page
Home ←STEM HQ ← Getting Started with Arduino ← Arduino Lesson 8


