Lesson 3: - From Serial to Sound: Connecting a Speaker
Lesson 3: From Serial to Sound
Lesson 6 - Real world data at your fingertips: Light, Ultrasonic Motion and more...
Lesson 7 - Build your own BLE ultrasonic motion detector for under $AUD30
Connecting to the World Beyond
Time to go beyond the simple LED light on your Arduino board.
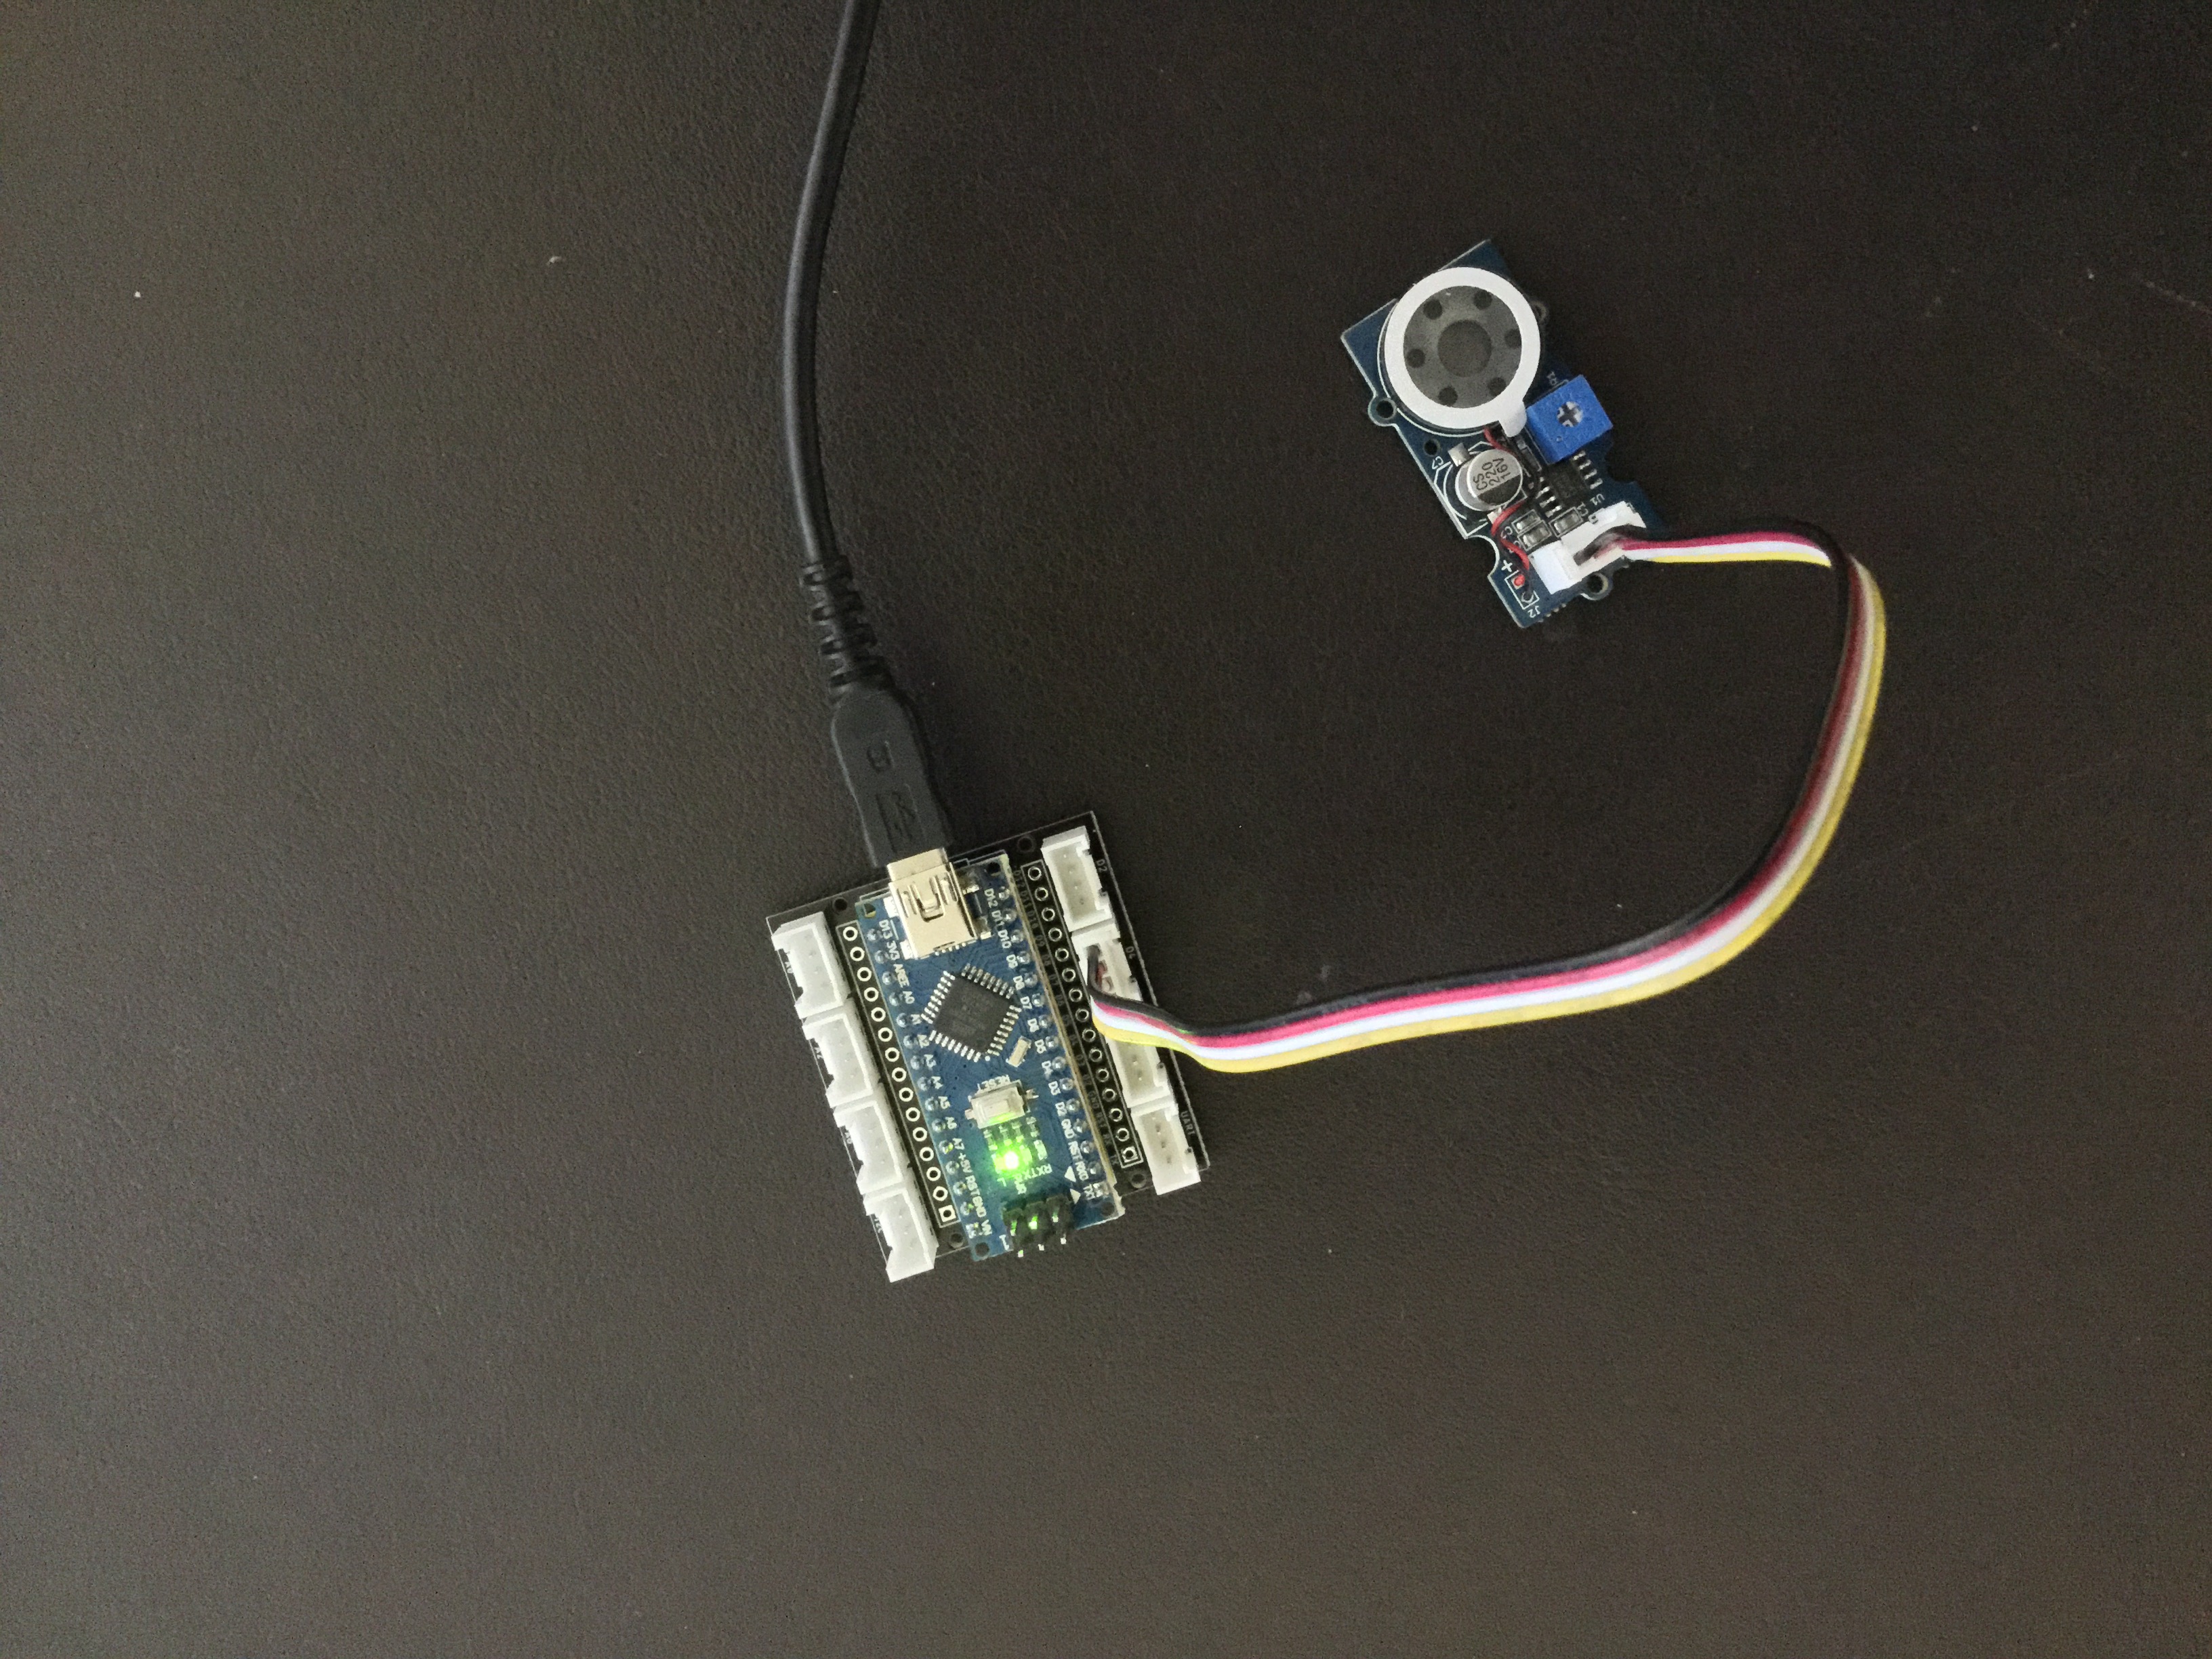
Right now is a good time to have a quick look at our Arduino boards in more detail. The board communicates with the world outside via connector pins. There are 20 pins available, including eight digital pins (0 to 7 or D0 to D7), six analog pins (14 to 19 or A0 - A6) and other special purpose pins, particularly voltage and ground pins for connecting power.
Look around the board for pins labelled GND. These are "ground" pins and are used to complete a circuit when power is required to be sent to an external device. The power comes as either 3.3V (volts) or 5V. Some devices could be damaged if the higher voltage is used, so be careful that you check on the requirements. You will see pins labelled 3V3 and 5V and GND pins at several places around the boards, and generally these may be used interchangeably.

Making Some Noise - Connecting a Simple Speaker
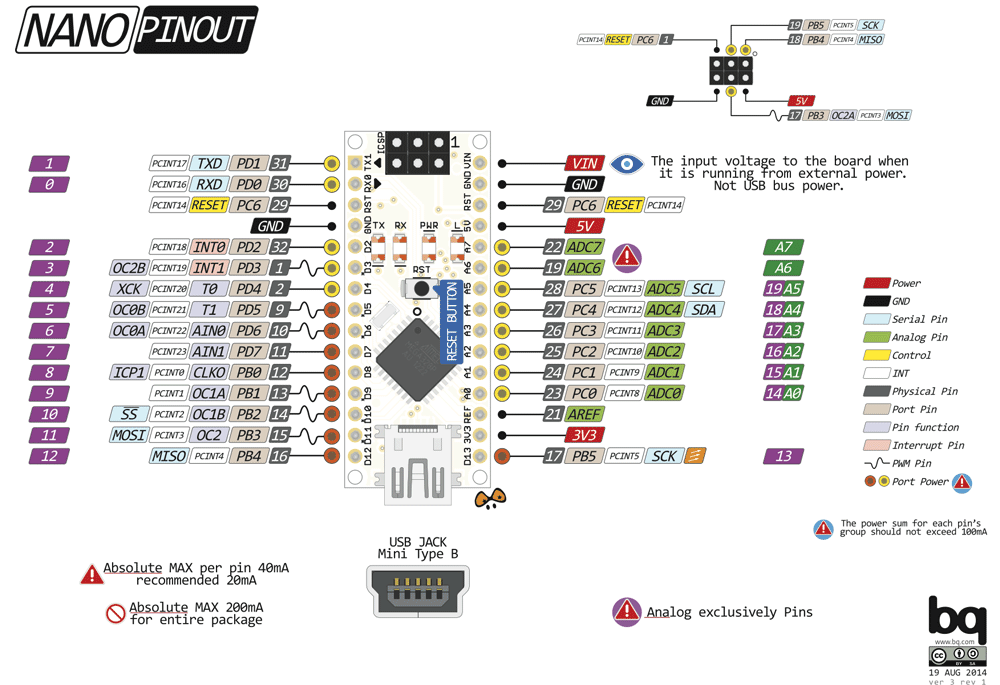
For many peripherals (such as the simple speaker used here) the power is sent to the peripheral via the pin that is allocated to it. In the example below, we have used digital pin 4, but any digital (or analog) pin could have served. The ground pin (GND) has the black jumper. So power is sent through pin 4 to the speaker, then back to the GND pin, completing the circuit. Simple!
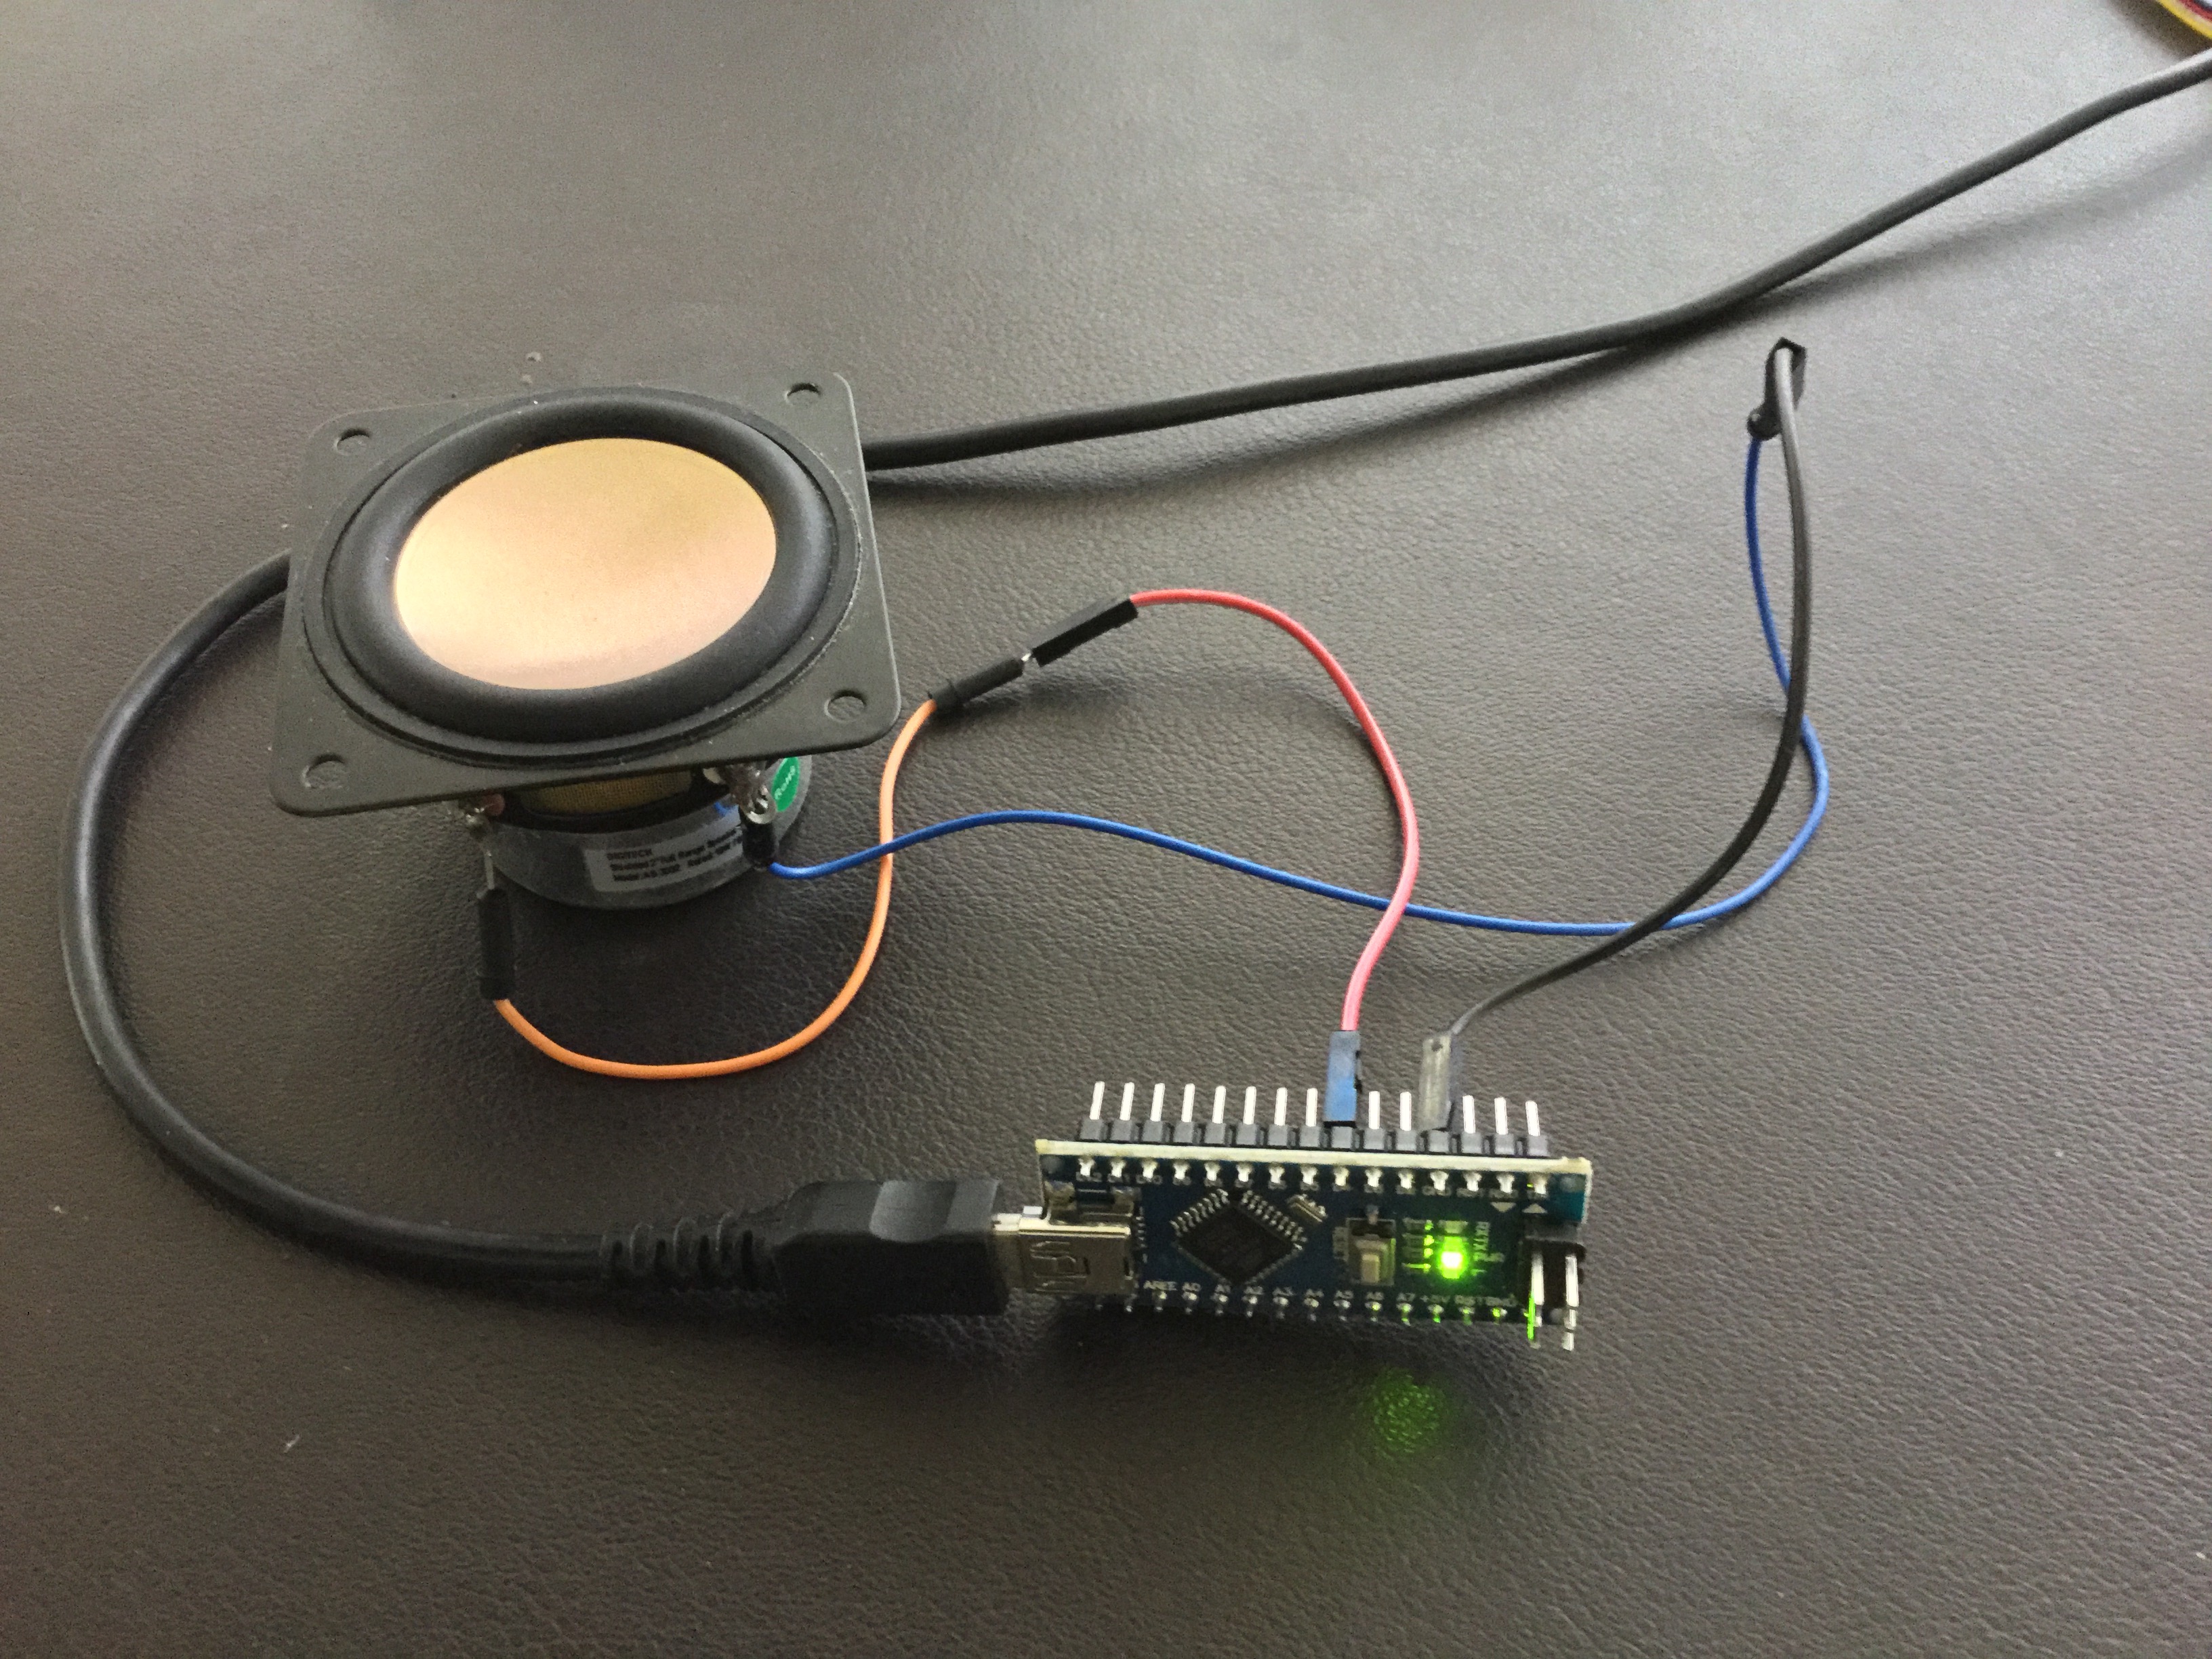
If you have access to other sensors (including Grove kits) you might find a buzzer (or even a speaker as shown below) in your collection. This activity works for a simple buzzer, as well as for a proper speaker (although it will not have quite the same pleasant sound!). Just make sure that you nominate the right pin number. For many of the Grove Sensors, the white lead is not used: black is GND, red is the voltage (usually 3V3) and the yellow is the actual "SIG" (signal) pin which you can set to any of the pins that suits. In the image below, I am using my Nano with a Grove shield which makes it easy to connect a range of sensors.
|
|
Look closely at the sketch now, line by line. Some useful and interesting things are happening here.
First we define three types of variables. "notes" is a list of integer values, corresponding to the frequencies of scale from C2 to C3 (note that the standard value is 440 MHz for A4, the A below middle C. These are approximate values only so they may not always sound exactly as you might expect.)
Next, we define a string ("inString") and, for convenience, the pin value we will use. Try different values, moving your jumper to other pin locations.
We are using a "while" loop here, an alternative to the "if" statement used previously. Both are suitable options for tests such as this. As previously, we define a character called "recvChar" as the result of reading input from the Serial monitor.
For this sketch, we want the serial input to be an integer value from 0 to 7, corresponding to the 8 elements of the "notes" list (so notes[0] = 131, notes[7] = 262).
Once a character has been read from the Serial Monitor, it is checked to see if it is numeric (isDigit). If so, then it is added to the waiting string, inString. This is converted from string to integer by the in-built function, string.toInt().
The tone command takes three parameters - the pin to be used, the frequency of the note, and the duration in milliseconds. Note that if the input is 0, then the tone played will be note[0], the first entry in the note list. Print the input to the Serial Monitor just to see what is happening, and then clear the string to start over for the next input.
Note: the opposite of the tone() command is noTone() - case sensitive and taking no arguments.
A Little More Musical
Instead of typing numbers, wouldn't it be good to be able to type actualy note names and have these played? Think about the switch function from the last lesson, with cases such as "C4" and "B3", etc.
And what about actually playing tunes? For that we might need lists for both note frequency and duration...
int soundpin = 4;
void setup() {
Serial.begin(9600);}void loop() {
while(Serial.available()){}char recvChar = Serial.read();
}switch(recvChar) {
case 'c':
tone(soundpin, 131, 200); break;case 'd':
tone(soundpin, 147, 200); break;case 'e':
tone(soundpin, 165, 200); break;case 'f':
tone(soundpin, 175, 200); break;case 'g':
tone(soundpin, 196, 200); break;case 'a':
tone(soundpin, 220, 200); break;case 'b':
tone(soundpin, 247, 200); break;case 'C': // using uppercase for octave
tone(soundpin, 262, 200); break;}int soundpin = 4;
// notes in the melody: int melody[] = {165, 147, 131, 147, 165, 164, 165, 147, 146, 147, 165, 195, 196};
// note durations: 4 = quarter note, 8 = eighth note, etc.:
int durations[] = {4, 4, 4, 4, 4, 4, 2, 4, 4, 2, 4, 4, 2};
void setup() {
Serial.begin(9600);}void loop() {
}while(Serial.available()){
}char recvChar = Serial.read(); Serial.println(recvChar);
switch(recvChar) { case '1': for (int thisNote = 0; thisNote < 13; thisNote++) {
// to calculate the note duration, take one second // divided by the note type. //e.g. quarter note = 1000 / 4, eighth note = 1000/8, etc. tone(soundpin, melody[thisNote], 1000/durations[thisNote]); int pauseBetweenNotes = 1000/durations[thisNote] + 50; //delay between pulse delay(pauseBetweenNotes); noTone(soundpin); // stop the tone playing} break; }
Home ←STEM HQ ← Getting Started with Arduino ← Arduino Lesson 3