Lesson 8 - Build your own BLE ultrasonic motion detector for under $USD30
Use your Chrome browser on Mac, Android or ChromeBook or the LightBlue App for iOS or Android to test this sketch. Texas Instruments TI-Nspire Scripting Support Page Download the TI-Nspire LaunchPad document for this lesson or the more general TI-SensorTag document.
Lesson 7 - Real world data at your fingertips: Light, Ultrasonic Motion and more...
Lesson 8 - Build your own BLE ultrasonic motion detector for under $USD30
|
STEM on a Budget
|
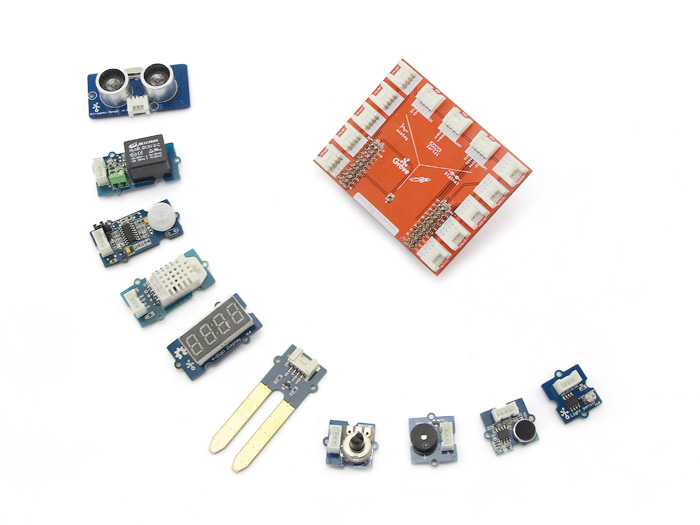 Grove Starter Kit for LaunchPad ($USD59) Grove Starter Kit for LaunchPad ($USD59)
|
Hacking the Hub™
|
 TI Innovator™ Hub (with MSP432 LaunchPad) TI Innovator™ Hub (with MSP432 LaunchPad) |
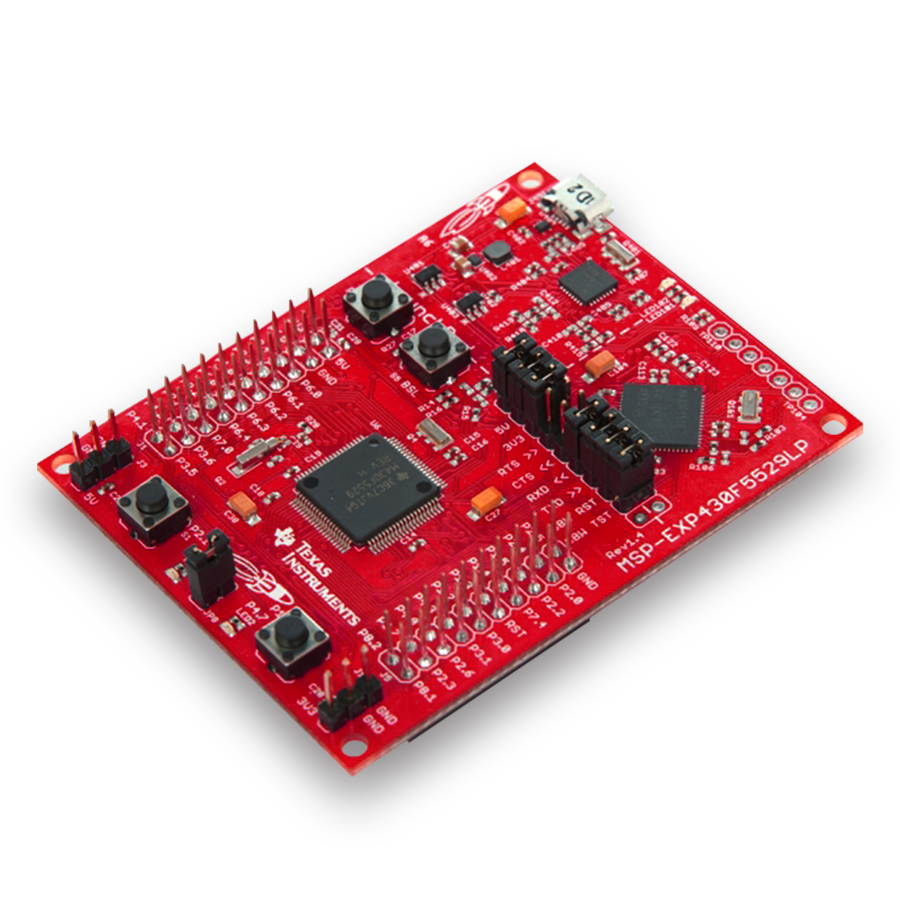 Texas Instruments MSP430 LaunchPad ($USD12.99 or ~$AUD21)
 Texas Instruments MSP432 LaunchPad ($USD19.99 or ~$AUD31)
|
|
|

 Generic HM-10 BLE module (under $USD5)
 Generic HC-SR04 ultrasonic motion sensor (under $USD5)
 Jumper leads (you will need female-female) (you can buy a bundle of these for around $USD5)
First, we will connect the jumpers from our modules to our board.
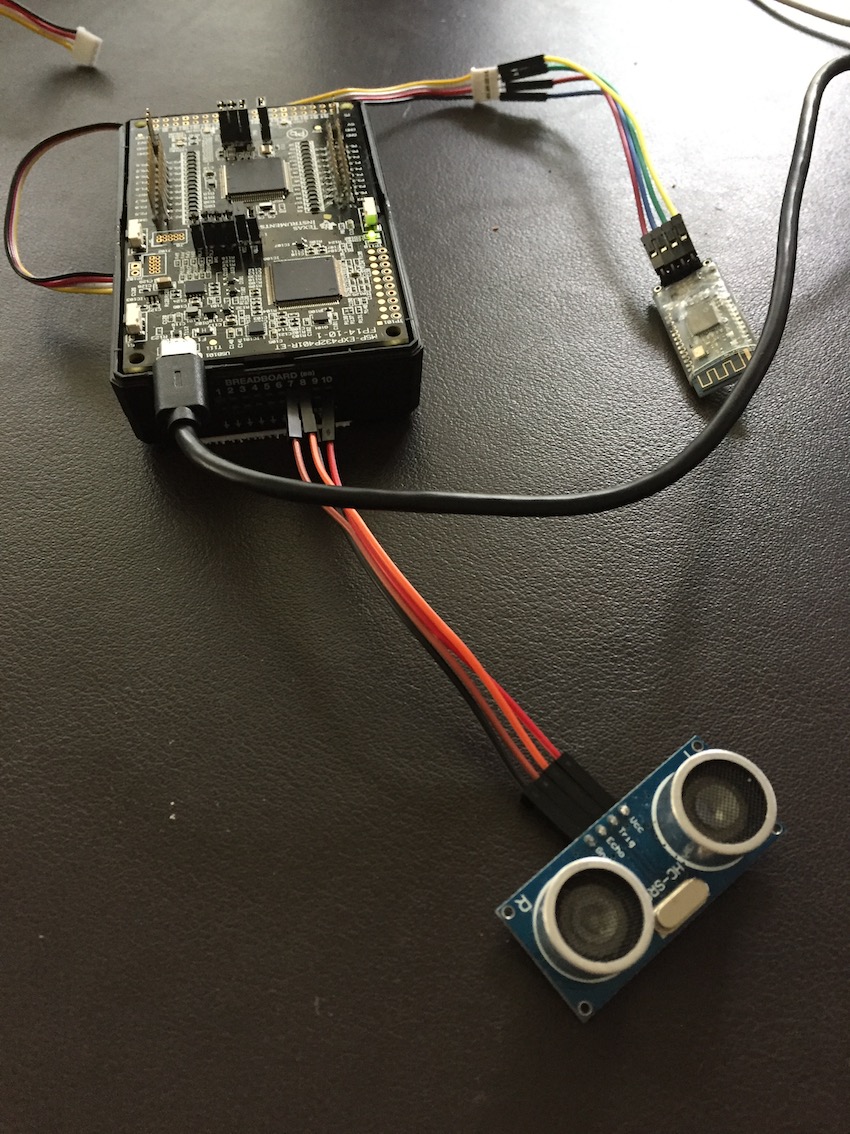
HM-10 BLE Module: This is a six pin module (of which we use four), with the pins clearly labelled on the underside:
VCC is the voltage: I connected this to pin 1 (3V3).
GND is the ground: I connected this to pin 22 (GND).
TXD is TRANSMIT: I connected this to pin 3 (P3.2).
RXD is RECEIVE: I connected this to pin 4 (P3.3).
This is the same combination as used by the Grove BLE module (NOTE that TX on the module connects to RX on the board, and vice versa).
HC-SR04 Ultrasonic Module: This is a four pin module like the Grove, but the pins perform different functions here (again the pins are clearly labelled). The Grove module uses just three pins: VCC, GND and SIG (Signal). This module has VCC (5V) and GND, but also TRIG (Trigger) and ECHO.
VCC is the voltage: I connected this to pin 20 (5V).
GND is the ground: I connected this to any pin labelled GND.
TRIG: I connected this to pin 13 (hub BB6).
ECHO: I connected this to pin 12 (hub BB5).
|
LaunchPad Sketch: Simple Distance (Copy and paste into Energia)
int TRIG_PIN = 13;
int ECHO_PIN = 12; void setup() {
pinMode(TRIG_PIN, OUTPUT);
pinMode(ECHO_PIN,INPUT);
Serial.begin(9600);
Serial1.begin(9600);
} void loop() { buttonState1 = digitalRead(PUSH1);
buttonState2 = digitalRead(PUSH2); long duration, distance;
digitalWrite(TRIG_PIN, LOW);
delay(1);
digitalWrite(TRIG_PIN, HIGH);
delay(5);
digitalWrite(TRIG_PIN,LOW); duration = pulseIn(ECHO_PIN,HIGH);
distance = (duration/2)/29.1; Serial1.print("D");
Serial1.println(distance); Serial.print(" Distance: ");
Serial.print(distance);
Serial.println(" cm ");
LaunchPad Sketch: Distance with Remote Controls (Copy and paste into Energia)
int TRIG_PIN = 13;
int ECHO_PIN = 12;
int buttonState1 = 0;
int buttonState2 = 0; void setup() {
pinMode(TRIG_PIN, OUTPUT);
pinMode(ECHO_PIN,INPUT); pinMode(RED_LED, OUTPUT);
pinMode(GREEN_LED, OUTPUT); pinMode(PUSH1, INPUT_PULLUP);
pinMode(PUSH2, INPUT_PULLUP); Serial.begin(9600);
Serial1.begin(9600);
} void loop() { long duration, distance;
digitalWrite(TRIG_PIN, LOW);
delay(1);
digitalWrite(TRIG_PIN, HIGH);
delay(5);
digitalWrite(TRIG_PIN,LOW); duration = pulseIn(ECHO_PIN,HIGH);
distance = (duration/2)/29.1; Serial1.print("D");
Serial1.println(distance); Serial.print(" Distance: ");
Serial.print(distance);
Serial.println(" cm ");
if (buttonState1 == LOW) {
if (buttonState2 == LOW) { Serial1.println("P2"); Serial.println("PUSH2"); digitalWrite(GREEN_LED, LOW); digitalWrite(RED_LED, HIGH);} }
|
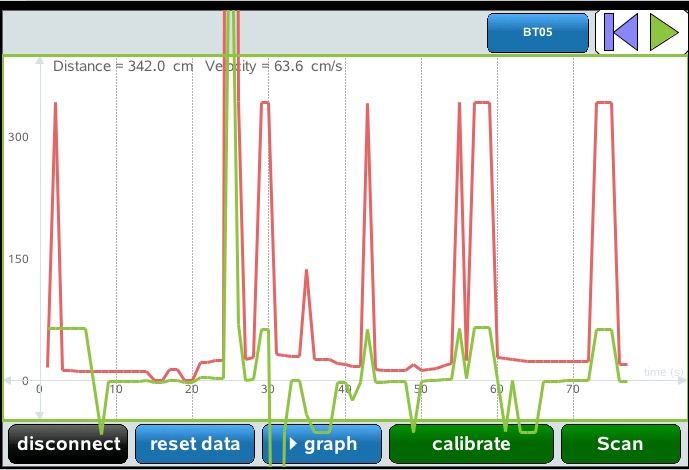
Now we can have a look at the very simple sketch I have used here and see if you can understand what is happening. It is essentially the same as that we used for distance in the last lesson, but simpler, and easier to follow. As well as the usual Serial and Serial1 (BLE), we define the two pins which will serve as TRIGGER (we use pin 27 and this will function as an OUTPUT, since pulses of ultrasonic sound will be sent from this) and ECHO (pin 26, and this will be INPUT since it will receive the sound bounced back from the nearest object). The duration is calculated as the time it takes for an echo to be heard. Divide that time by 2 (since it had to travel there and back again) and then divide by a constant (in this case 29.1) which converts that time into the distance of the object in centimetres, using the speed of sound. This distance in centimetres is sent to the BLE Serial1 port with the string "D" (eg "D142" for a distance of 142 cm). Our Lua script from the previous lesson will work well to receive and understand this. A more verbose form ("Distance: 142 cm") is sent to the computer Serial port. This simple sketch will not use buttons or LEDs. Instead, the loop serves to continuously send HIGH and LOW pulses of sound from the TRIGGER, and listen for the ECHO when these are bounced back to pin 26 (in the Grove module, the SIG pin serves both these functions). Try extending the sketch to include buttons and LEDs. The buttons could simply serve as remotes - PUSH1 as enterKey to play and pause the data collection, PUSH2 as an escapeKey to reset (these functions are already included in the Lua script for the attached document). The LEDs might be used to show when the ECHO is being received. When you have tried yourself, check one option that I have done: For free options to test and explore our BLE code, we can use the LightBlue App for iOS or Android, or your Chrome browser on Mac, Android or ChromeBooks. |
Congratulations! You now have a functional and elegant BLE motion sensor which is accurate from 0 to around 450 cm.
There are numerous variations on the BLE and ultrasonic modules - I looked for the least expensive to try these out and see if they worked (and they did!) I found eBay to be a great source of such items since you generally have a fairly wide range of choice, and can usually find an option with free shipping and postage. Any modules that use the same chip should work fairly easily (although like me, you may have to do a little Googling to find someone else who has written a sketch for that module!). HM-10 for BLE and HC-SR04 (or HC-SR05 I believe) should work for you.
Obviously, there is nothing to stop you from doing the same thing with other sensors and modules - aim small at first, but soon you should be able to create interesting and useful systems of your own!
If you run into problems, or you try new things, please feel free to drop me a line and I will happily do what I can to help you to get started.
Or (if you are using Chrome browser on Mac, Android or Chromebook, or the WebBLE app on iPad) you might just try this for yourself!
BLE LaunchPad Controls |
|
Helpful Hints...
Make sure your LaunchPad with BLE module and suitable sketch is powered and close by, and tap on the button above to connect. Then try the following either by typing the given commands into the input box below, or scroll down to use the buttons which will automate this process. A log of the session will be stored on the text box opposite.
- LED controls: r (red), g (green), b (blue)
- Numbers such as 110 and 220 will play these tones if a speaker is attached.
- If an HC-SR04 ultrasonic ranger is connected, then h will display the distance. If Grove Rangers are connected, then use d and/or D.
- Use l for Light Intensity and s for Sound Intensity.
- [I2C] Use p for Barometric Pressure ("p") and Temperature ("t"). and use x for 3-axis Accelerometer.
- [Robot] F (Forward), B (Back), L (Left) and R (Right). You might also use A (Auto drive).
- Use n to RESET.
Home ← TI-Nspire Scripting HQ ← STEM HQ ← Getting Started with TI LaunchPads ← TI LaunchPad Lesson 8