Home ← STEM HQ ← TI-Nspire Authoring ← TI-Nspire Scripting HQ ← Scripting Tutorial - Lesson 41
Scripting Tutorial - Lesson 41: Lua Scripting and the TI Innovator™ Hub:
1. SENDING to the Hub
TI Innovator™ Hub Lesson 0: Using Lua to store and edit TI-BASIC programs for the Innovator™ Hub (Lua Scripting Lesson 40)
TI Innovator™ Hub Lesson 1: SENDING to the Hub: Controlling the Action (Lua Scripting Lesson 41)
TI Innovator™ Hub Lesson 2: READING from the Hub: Real world interaction and data (Lua Scripting Lesson 42)
TI Innovator™ Hub Lesson 3: Exploring the OneShotTimer: Learning to Wait! (Lua Scripting Lesson 43)
TI Innovator™ Hub Lesson 4: Making Music with the Innovator™ Hub (Lua Scripting Lesson 44)
TI Innovator™ Hub Lesson 5: Build your own Innovator™ Hub Robot (Lua Scripting Lesson 45)
TI Innovator™ Hub Lesson 6: Create a general Innovator™ Hub Document (Lua Scripting Lesson 46)
TI Innovator™ Hub Lesson 7: Create a General Innovator™ Hub and BLE Document (Lua Scripting Lesson 47)
Download supporting file for this tutorial
Texas Instruments TI-Nspire Scripting Support Page
Welcome to the TI Innovator™ Hub
The TI Innovator™ Hub is the centerpiece of the TI-Innovator™ System, a project kit that extends the functionality of Texas Instruments (TI) graphing calculators to make coding and engineering design accessible to students in the classroom. Plug-and-play and ready-to-use with TI graphing calculators, the TI-Innovator™ Hub enables students to learn basic coding and design, use those skills to program and build working solutions, and connect science, technology, engineering and math (STEM) concepts.
The Hub itself is based around a TI MSP432 LaunchPad board, which carries on it a complex series of scripts (called 'sketches') which translate commands from the user into Hub actions and responses. To learn more about programming such boards, feel free to explore the LaunchPad tutorials on this site.
More importantly, the Innovator Hub can be programmed using TI-BASIC, the simple and readily accessible programming language available on TI handhelds (both TI-Nspire and TI-84 series) and software. Students use simple commands and programs to engage with and control the Hub, bringing together all the key elements of STEM and more.
Which raises the question: why use Lua with the Innovator Hub?
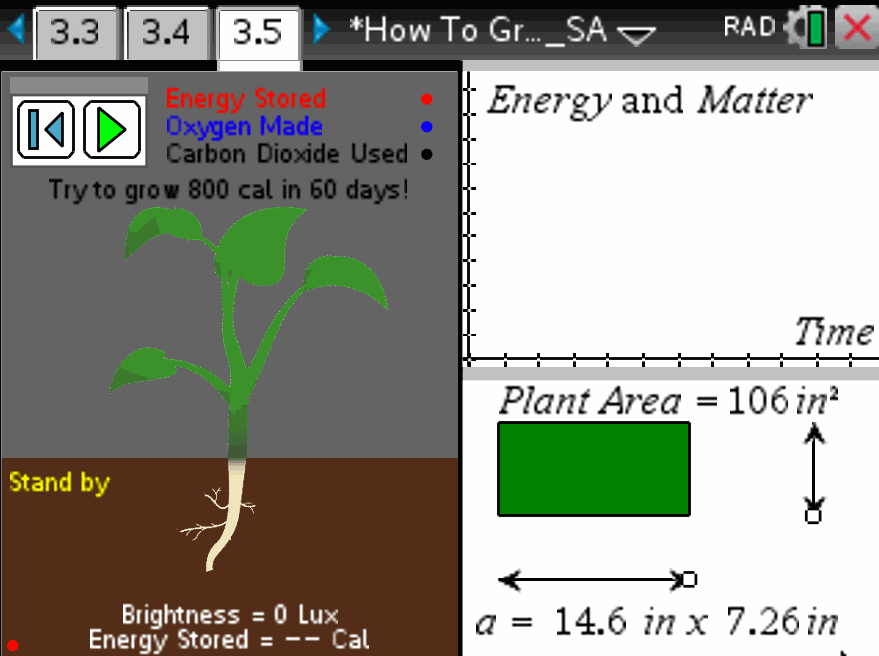
The main advantage of Lua for use with the Hub will obviously lie in the creation of interactive documents for teaching and learning. Lua and the TI-Nspire are now well-recognised as a powerful partnership for authoring, and the Innovator Hub adds significantly to the opportunities for active and appropriate student engagement across a wide range of curriculum topics, particularly in relation to STEM. For example, consider the activity shown in the animated GIF opposite, in which the Innovator brightness sensor is used to determine the growth rate of plants under different light conditions. Or have students learn the real principles of acceleration controlling a Lunar Lander!
While TI-BASIC offers a great platform for simple interactions and programs, a limitation exists which becomes obvious when seeking to collect data samples: while such samples can be readily collected, you must wait until the entire program has run before you will see the results on your handheld or computer. So a graph of light intensity, for example, will not update until all samples have been collected. This is not a limitation when using Lua on desktop or handheld.
Interacting with the Innovator Hub, using either TI-BASIC of Lua, is mostly centred around two key activities: SETTing and READing.
SENDing lies at the heart of all interactions with the Hub: whether from a TI-BASIC program or from a Lua script, commands are sent to the Hub via USB connection (also called Asynchronous Interface or ASI). Such commands must be in the right format and syntax, and a well-authored Lua script can take care of much of the uncertainty that students may face in this regard.
SET commands will involve on-board functionality, such as the in-built LEDs and speaker, or attached devices such as lights, relays, servos, and more. These will tend to be either digital (ON/OFF) or analog, and so commands will often be of the form "SET ... ON" or "SET ... OFF".
READing occurs when the Hub sends a response back to the sent request. this may be as simple as letting the device know that the hub is ready, but will commonly involve the transmission of data from Hub or attached peripheral (sensors, servo motors, LEDs, relays, and more). Such data may be in the form of a single numerical value (for example, brightness or distance), or could be a list of values - for example, a 3-axis accelerometer will send a list of three values for x, y and z axes, while a barometer will commonly send air pressure, temperature, altitude and more.
The focus of this first lesson is on the TI Innovator SEND command, and you will learn how to send commands to the Hub, and to make certain simple things happen on board.

Scripting for the Innovator Hub: Lesson 1: SENDING to the Hub
The heavy lifting in the scripts in this section was all achieved by Fred Fotsch - thank you Fred!
Every effort has been made to make this script as simple as possible, so there is very little in the way of layout and design - no buttons, sliders, or anything fancy. However, you will see that the Innovator functions are, in fact, far from simple, but this should not deter you from trying some of your own scripting ideas.
If you have previously worked through some or all of the Lua BLE lessons, you will understand that much of the hard work has been done, and may be readily accomplished using copy and paste. Focus on the general principles and those sections specified for the user to interact with the script.
To help with this, once again, I have broken the script down into main sections, which may be viewed individually (or viewed as a whole, and copied and pasted to make a full working document).
First notice that we are now using APIlevel 2.7!! Specifically designed around the Innovator Hub.
You might also see a simple function called 'addMsg', which is used to print information to the screen as well as to the script editor console. In your future scripts you probably won't need your users to see the details of connection and activity, but for our purposes here it is quite instructive to follow the process as it occurs "under the hood".
Look closely at the three highlighted lines at the start of on.construction: these make the magic happen!
You will see that the menu is used to save a lot of layout and screen display, and makes it easy to include a range of examples for you to explore. The default action for this document is to turn the red LED ("LIGHT") on and off by simply pressing down and up on the screen.
Most of the commands are of the same form: "SET ... ON" or "SET ... OFF". So "SET LIGHT ON" is the default and is easily changed to, for example, "SET COLOR.BLUE ON".
The in-built speaker is introduced here: "SET SOUND 220 5" plays an A tone for 5 seconds.
The remaining menu items introduce external peripherals: LED, speaker, servo motor and two generic ones (very useful indeed!): ANALOG.OUT and DIGITAL.OUT. These last two may be used for any appropriate peripheral, and when used with the breadboard connectors (BB1 to BB10) give the Innovator Hub enormous flexibility.
Note the servo: The in-built functions are simple, but when using external connections, then these must first be CONNECTed to the appropriate port: for a servo, we generally use OUT3, which supplies 5V (OUT1 and OUT2 are 3.3V ports). So choosing this menu option first sends a command to the Hub to connect a servo to OUT3. Subsequent commands will be of the form "SET SERVO 1 CW 50 5" which turns the servo clockwise for 5 seconds (or until it receives a zero time command).
- Very simple - note the neat color change when the hub is connected?
- Again, the user interaction here is so simple: press the mouse down and one command is sent to the Hub, release and another is sent. NOTE that the three TI_Innovator functions here are NOT required for this document - they only come into play when feedback from the Hub is read. This will be explored in the next lesson.
You may be well familiar with the Lua on.timer command (as was I before I started working with the Innovator) but this is another approach altogether. Think of it like an advanced "wait" command. This interesting function takes a time to wait (in milliseconds, so use 1000 to wait for 1 second), and then calls a function or list of functions and parameters. The OneShotTimer will be covered in more detail later: in this document, it is used only when the Hub is being scanned and connected - mostly because the device (developed around the handheld and its limitations) needs time to process each step of the process.
- If you have worked with the BLE functions for Lua, then the basic principles of this will be familiar. Feel free to browse through the functions and follow the process by which the Innovator is scanned, found, connected, etc - but expect to just copy and paste this code into your own scripts to make them "Hub-enabled"!
Once again, if you have a Hub, you can test this script yourself by copying and pasting from this page. Of course, prepared versions are also available from the download link for this page.
end-- TI Innovator Init Values
platform.apilevel = '2.7' local screen = platform.window local date = "021517"
require 'color' pcall(function() require 'asi' end)
local isASIavailable = false local hubStrOn, hubStrOff, msgStr
function addMsg(input)
msgStr = input print(msgStr) screen:invalidate()end
function on.construction()
end--the next three lines are required for Hub connection TI_Innovator.init(TI_InnovatorStateCallback) TI_Innovator.setReadListener(TI_InnovatorReadCallback) TI_Innovator.connect()
Menu={
{"About",} toolpalette.register(Menu) screen:invalidate(){" ©2017 Texas Instruments", function() end}, {" Version "..date, function() end}, {" Contact: steve@compasstech.com.au", function() end},}, {"Controls",{"Scan and Connect", function() TI_Innovator.connect() end}, {"Disconnect", function() TI_Innovator.disconnect() end}, {"RESET", function() on.resize() end},}, {"SET Samples",{"SET LIGHT ON/OFF (default)", function() hubStrOn = "SET LIGHT ON" hubStrOff = "SET LIGHT OFF" TI_Innovator.Send(hubStrOn) end}, {"SET COLOR.RED ON/OFF", function() hubStrOn = "SET COLOR.RED ON" hubStrOff = "SET COLOR.RED OFF" TI_Innovator.Send(hubStrOn) end}, {"SET COLOR.GREEN ON/OFF", function() hubStrOn = "SET COLOR.GREEN ON" hubStrOff = "SET COLOR.GREEN OFF" TI_Innovator.Send(hubStrOn) end}, {"SET COLOR.BLUE ON/OFF", function() hubStrOn = "SET COLOR.BLUE ON" hubStrOff = "SET COLOR.BLUE OFF" TI_Innovator.Send(hubStrOn) end}, {"SET SOUND 220 5", function() hubStrOn = "SET SOUND 220 5" hubStrOff = "SET SOUND 0 1" TI_Innovator.Send(hubStrOn) end}, {"SET SPEAKER 1 220 5", function() hubStrOn = "SET SPEAKER 1 220 5" TI_Innovator.Send("CONNECT SPEAKER 1 OUT1") TI_Innovator.Send(hubStrOn) hubStrOff = "SET SPEAKER 1 0 1" end}, {"SET LED 1 ON", function() hubStrOn = "SET LED 1 ON" TI_Innovator.Send("CONNECT LED 1 OUT 1") TI_Innovator.Send(hubStrOn) hubStrOff = "SET LED 1 0FF" end}, {"SET SPEAKER 1 ON", function() hubStrOn = "SET SPEAKER 1 ON" TI_Innovator.Send("CONNECT SPEAKER 1 OUT 1") TI_Innovator.Send(hubStrOn) hubStrOff = "SET SPEAKER 1 0FF" end}, {"SET SERVO 1 CW 50 5", function() TI_Innovator.Send("CONNECT SERVO 1 OUT3") hubStrOn = "SET SERVO 1 CW 50 5" hubStrOff = "SET SERVO 1 CW 50 0" TI_Innovator.Send(hubStrOn) end}, {"SET ANALOG.OUT 1 100", function() hubStrOn = "SET ANALOG.OUT 1 100" TI_Innovator.Send("CONNECT ANALOG.OUT 1 OUT 1") TI_Innovator.Send(hubStrOn) hubStrOff = "SET ANALOG.OUT 1 0" end}, {"SET DIGITAL.OUT 1 ON", function() hubStrOn = "SET DIGITAL.OUT 1 ON" TI_Innovator.Send("CONNECT DIGITAL.OUT 1 OUT 1") TI_Innovator.Send(hubStrOn) hubStrOff = "SET DIGITAL.OUT 1 0FF" end},},-- Layout Functions
function on.resize(width, height)
w = screen:width() h = screen:height() hubStrOn, hubStrOff, msgStr = "SET LIGHT ON", "SET LIGHT OFF", "SET LIGHT OFF" if TI_Innovator.isConnected() then TI_Innovator.Send('BEGIN') addMsg("TI Innovator Hub ready") end screen:invalidate()endfunction on.paint (gc)
endif TI_Innovator.isConnected() then
gc:setColorRGB (0,255,0) gc:fillRect (0, 0, w, 0.025*h)else gc:setColorRGB (255,0,0) gc:fillRect (0, 0, w, 0.025*h) gc:drawString("Wait for connection, then", 0.1*w, 0.1*h, "middle") gc:drawString("press anywhere to activate Hub", 0.1*w, 0.2*h, "middle")gc:drawString(msgStr, 0.1*w, 0.9*h, "middle")
-- TI Innovator User set up
function on.escapeKey()
TI_Innovator.Send(hubStrOff) on.resize() screen:invalidate()endfunction on.mouseDown(x, y)
TI_Innovator.Send(hubStrOn) -- This is an example of sending a SET command to the Hub screen:invalidate()endfunction on.mouseUp (x,y)
TI_Innovator.Send(hubStrOff) screen:invalidate()endfunction str2list(input, def) local list = {} if input:find(def) then
list = input:split(def) table.foreachi(list,print)elselist = {input}end return list endfunction TI_InnovatorReadCallback(port, error_msg) -- this is the callback function that is defined above and catches the result of a READ command send to the Hub.
rxValue = port:getValue() or '' -- this gets the actual return value from the hub and puts it in the variable rxValue. The user may choose any variable name and also may do any calibration or ranging of the value here. Note that rxValue may be numeric, list or string (hence the utility function list2str) if tonumber(rxValue) then rxValue = math.floor(100*rxValue+0.5)/100 else rxValue = tostring(rxValue) rxValue = str2list(rxValue,string.char(10))[1] end addMsg(hubStrOn) if tonumber(rxValue) then voltage = (rxValue/2^14)*3.3 end -- an example of converting a raw 14 bit ADC value into voltage. screen:invalidate()endfunction TI_InnovatorStateCallback(event)
endaddMsg("TI_InnovatorStateCallback") if 'ready' == event then TI_InnovatorConfig() elseif "disconnected" == event then -- user may choose to do some clean up or display a msg when the Hub is disconnected. addMsg("TI_Innovator Hub disconnected") end screen:invalidate()
function TI_InnovatorConfig() -- this function is called from TI_InnovatorStateCallback() when a ready connection is succesful.
-- place CONNECT and other Hub startup commands here addMsg("TI_Innovator Hub connected")end--End of user code do not modify below this line
-- TI Innovator Code Do not modify any code below this line
-- oneShotTimer BEGINS
local timerstart = timer.start local timerstop = timer.stop timer.start = nil timer.stop = nil local currentTimer = nil
local function timerStart(t)
endcurrentTimer = t timerstart(t.period/1000)
local function timerStop()
endcurrentTimer = nil timerstop()
local function setTimer(t)
endif t.period==nil or type(t.period)~='number' or t.period < 10 then error('period in milliseconds >= 10') end timerStart(t) return t
function oneShotTimer(period, listenerHandler, ...)
endif type(listenerHandler) ~= 'function' then
error('createTimerOneShot: function expected')end setTimer {period = period, oneShot = true, listenerHandler = listenerHandler, params = { ... },}function on.timer()
endlocal ct = currentTimer if currentTimer == nil then
timerStop()end if currentTimer.oneShot thencurrentTimer = nil timerStop()end ct.listenerHandler(unpack(ct.params))-- oneShotTimer ENDS
-- TI Innovator BEGINS
TI_Innovator = { }
function TI_Innovator.init(theStateCallback)
endif not pcall(function() require 'asi' end) then
addMsg('Hub NOT available') returnendaddMsg('Hub available')
isASIavailable = true
local HANDSHAKE_GREETING = 'ISTI\n' local HANDSHAKE_ANSWER = 'TISTEM' local portFoundList = { } local state local handshakeState local notifyEvent local asiStateListener local startScanning local stopScanning local portFoundListener local portStateListener local handshake_SendListener local handshake_readListener local handshake_port local TI_Innovator_port local baudRate = asi.BAUD_RATE_DEFAULT local readTimeout = asi.READ_TIMEOUT_DEFAULT
-- User callbacks local stateCallback = theStateCallback local SendCallback local readCallback
function notifyEvent(event)
addMsg('notifying '.. event) if stateCallback thenendstateCallback(event)elseaddMsg('no callback registered')endfunction startScanning()
if isASIavailable thenendasi.startScanning(portFoundListener) notifyEvent('scanning')endfunction stopScanning()
handshake_port = nil portFoundList = { } asi.stopScanning()endfunction asiStateListener(asiState)
if asi.ON == asiState thenendif state == 'active' thenelseif asi.UNSUPPORTED == asiState thenstartScanning()endnotifyEvent(asi.UNSUPPORTED)endfunction portFoundListener(portFound)
addMsg('portFoundListener '.. portFound:getName()) table.insert(portFoundList, portFound) if not TI_Innovator_port and not handshake_port thenendhandshake_port = portFoundList[1] oneShotTimer(100, handshake_port.connect, handshake_port, portStateListener)endfunction portStateListener(reportedPort, event, error_msg)
addMsg('portStateListener '..reportedPort:getName()..' '..event) if asi.CONNECTED == event thenend-- configure port for handshake reportedPort:setWriteListener(handshake_writeListener) reportedPort:setReadListener(handshake_readListener) reportedPort:setReadTimeout(500) handshakeState = 'handshake' -- write handshake greeting addMsg("HANDSHAKE_GREETING: "..HANDSHAKE_GREETING) oneShotTimer(200, reportedPort.write, reportedPort, HANDSHAKE_GREETING)elseif asi.CONNECTING_FAILED == event thenif reportedPort == handshake_port thenelseif asi.DISCONNECTED == event thentable.remove(portFoundList, 1) if #portFoundList>0 thenelseif reportedPort == TI_Innovator_port thenhandshake_port = portFoundList[1] handshake_port:connect(portStateListener)elsehandshake_port = nilendTI_Innovator_port = nil asi.startScanning(portFoundListener)endif reportedPort == TI_Innovator_port thenendif state == 'active' thenendif reportedPort:getState() == asi.DISCONNECTED thennotifyEvent('disconnected')reportedPort:connect(portStateListener)elseTI_Innovator_port = nil asi.startScanning(portFoundListener)endfunction handshake_writeListener(reportedPort, error_msg)
if error_msg thenendaddMsg('handshake_writeListener '..error_msg) returnend if 'handshake' == handshakeState thenreportedPort:read(#HANDSHAKE_ANSWER+2)endfunction handshake_readListener(reportedPort, error_msg)
if error_msg thenendaddMsg('handshake_writeListener '..error_msg) returnend local answer = reportedPort:getValue() if 'handshake' == handshakeState then-- Validate answer if answer and answer:find(HANDSHAKE_ANSWER) thenelseif 'ready' == handshakeState thenaddMsg("HANDSHAKE_ANSWER: "..HANDSHAKE_ANSWER) stopScanning() handshakeState = 'ready' reportedPort:write('BEGIN\n') reportedPort:read(7)elsereportedPort:disconnect() table.remove(portFoundList, 1) if #portFoundList>0 thenendhandshake_port = portFoundList[1] handshake_port:connect(portStateListener)elsehandshake_port = nilendif answer and answer:find('READY') thenend-- Configure port for normal use TI_Innovator_port = reportedPort TI_Innovator_port:setReadTimeout(readTimeout) TI_Innovator.setWriteListener(SendCallback) TI_Innovator.setReadListener(readCallback) -- Notify launchpad is ready notifyEvent('ready')end-- INTERFACE -- BEGINS --
function TI_Innovator.connect()
state = 'active' startScanning()endfunction TI_Innovator.disconnect()
state = 'inactive' if isASIavailable thenendif TI_Innovator_port thenendTI_Innovator_port:disconnect() TI_Innovator_port = nilend stopScanning()function TI_Innovator.setWriteListener(newWriteCallback)
writeCallback = newWriteCallback if TI_Innovator_port thenendTI_Innovator_port:setWriteListener(writeCallback)endfunction TI_Innovator.setReadListener(newReadCallback, newReadObject)
readCallback = newReadCallback if TI_Innovator_port thenendTI_Innovator_port:setReadListener(readCallback)endfunction TI_Innovator.setBaudRate(newBaudRate)
baudRate = newBaudRate if TI_Innovator_port thenendTI_Innovator_port:setBaudRate(baudRate)endfunction TI_Innovator.setReadTimeout(newReadTimeout)
readTimeout = newReadTimeout if TI_Innovator_port thenendTI_Innovator_port:setReadTimeout(readTimeout)endfunction TI_Innovator.Send(data)
if not TI_Innovator_port thenendaddMsg('No Hub attached') return 'No Hub attached'end local result = TI_Innovator_port:write(data .. '\n') if result then addMsg(tostring(data)..': '.. tostring(result)) else addMsg(tostring(data)) end return resultfunction TI_Innovator.Read(bytes_to_read)
addMsg('TI_Innovator.Read') if not TI_Innovator_port thenendreturn "No TI Hub attached"end return TI_Innovator_port:read(bytes_to_read)function TI_Innovator.request(request)
if not TI_Innovator_port thenendreturn "No TI Hub attached"end local result = TI_Innovator_port:write(request .. '\n') if result then addMsg(tostring(request)..': '.. tostring(result)) else addMsg(tostring(request)) end result = TI_Innovator_port:read() addMsg('read() '.. tostring(result)) if result thenaddMsg('Error sending request: ' .. tostring(request))end return resultfunction TI_Innovator.isConnected()
if not TI_Innovator_port thenendreturn falseend return TI_Innovator_port:getState() == asi.CONNECTEDfunction TI_Innovator.getName()
if not TI_Innovator_port thenendreturn "No TI Hub attached"end return TI_Innovator_port:getName()function TI_Innovator.getIdentifier()
if not TI_Innovator_port thenendreturn "No TI Hub attached"end return TI_Innovator_port:getIdentifier()-- INTERFACE -- ENDS --
-- Wait for the ASI to be up and running
asi.addStateListener(asiStateListener)
end
-- TI Innovator Init Values
platform.apilevel = '2.7' local screen = platform.window local date = "021517"
require 'color' pcall(function() require 'asi' end)
local isASIavailable = false local hubStrOn, hubStrOff, msgStr
function addMsg(input)
msgStr = input print(msgStr) screen:invalidate()end
function on.construction()
end--the next three lines are required for Hub connection TI_Innovator.init(TI_InnovatorStateCallback) TI_Innovator.setReadListener(TI_InnovatorReadCallback) TI_Innovator.connect()
Menu={
{"About",} toolpalette.register(Menu) screen:invalidate(){" ©2017 Texas Instruments", function() end}, {" Version "..date, function() end}, {" Contact: steve@compasstech.com.au", function() end},}, {"Controls",{"Scan and Connect", function() TI_Innovator.connect() end}, {"Disconnect", function() TI_Innovator.disconnect() end}, {"RESET", function() on.resize() end},}, {"SET Samples",{"SET LIGHT ON/OFF (default)", function() hubStrOn = "SET LIGHT ON" hubStrOff = "SET LIGHT OFF" TI_Innovator.Send(hubStrOn) end}, {"SET COLOR.RED ON/OFF", function() hubStrOn = "SET COLOR.RED ON" hubStrOff = "SET COLOR.RED OFF" TI_Innovator.Send(hubStrOn) end}, {"SET COLOR.GREEN ON/OFF", function() hubStrOn = "SET COLOR.GREEN ON" hubStrOff = "SET COLOR.GREEN OFF" TI_Innovator.Send(hubStrOn) end}, {"SET COLOR.BLUE ON/OFF", function() hubStrOn = "SET COLOR.BLUE ON" hubStrOff = "SET COLOR.BLUE OFF"TI_Innovator.Send(hubStrOn) end}, {"SET SOUND 220 5", function() hubStrOn = "SET SOUND 220 5" hubStrOff = "SET SOUND 0 1" TI_Innovator.Send(hubStrOn) end}, {"SET SPEAKER 1 220 5", function() hubStrOn = "SET SPEAKER 1 220 5" TI_Innovator.Send("CONNECT SPEAKER 1 OUT1") TI_Innovator.Send(hubStrOn) hubStrOff = "SET SPEAKER 1 0 1" end}, {"SET LED 1 ON", function() hubStrOn = "SET LED 1 ON" TI_Innovator.Send("CONNECT LED 1 OUT 1") TI_Innovator.Send(hubStrOn) hubStrOff = "SET LED 1 0FF" end}, {"SET SPEAKER 1 ON", function() hubStrOn = "SET SPEAKER 1 ON" TI_Innovator.Send("CONNECT SPEAKER 1 OUT 1") TI_Innovator.Send(hubStrOn) hubStrOff = "SET SPEAKER 1 0FF" end}, {"SET SERVO 1 CW 50 5", function() TI_Innovator.Send("CONNECT SERVO 1 OUT3") hubStrOn = "SET SERVO 1 CW 50 5" hubStrOff = "SET SERVO 1 CW 50 0" TI_Innovator.Send(hubStrOn) end}, {"SET ANALOG.OUT 1 100", function() hubStrOn = "SET ANALOG.OUT 1 100" TI_Innovator.Send("CONNECT ANALOG.OUT 1 OUT 1") TI_Innovator.Send(hubStrOn) hubStrOff = "SET ANALOG.OUT 1 0" end}, {"SET DIGITAL.OUT 1 ON", function() hubStrOn = "SET DIGITAL.OUT 1 ON" TI_Innovator.Send("CONNECT DIGITAL.OUT 1 OUT 1") TI_Innovator.Send(hubStrOn) hubStrOff = "SET DIGITAL.OUT 1 0FF" end},},-- Layout Functions
function on.resize(width, height)
w = screen:width() h = screen:height() hubStrOn, hubStrOff, msgStr = "SET LIGHT ON", "SET LIGHT OFF", "SET LIGHT OFF" if TI_Innovator.isConnected() then TI_Innovator.Send('BEGIN') addMsg("TI Innovator Hub ready") end screen:invalidate()endfunction on.paint (gc)
endif TI_Innovator.isConnected() then
gc:setColorRGB (0,255,0) gc:fillRect (0, 0, w, 0.025*h)elsegc:setColorRGB (255,0,0) gc:fillRect (0, 0, w, 0.025*h) gc:drawString("Wait for connection, then", 0.1*w, 0.1*h, "middle") gc:drawString("press anywhere to activate Hub", 0.1*w, 0.2*h, "middle")endgc:drawString(msgStr, 0.1*w, 0.9*h, "middle")
-- TI Innovator User set up
function on.escapeKey()
TI_Innovator.Send(hubStrOff) on.resize() screen:invalidate()endfunction on.mouseDown(x, y)
TI_Innovator.Send(hubStrOn) -- This is an example of sending a SET command to the Hub screen:invalidate()endfunction on.mouseUp (x,y)
TI_Innovator.Send(hubStrOff) screen:invalidate()endfunction str2list(input, def) local list = {} if input:find(def) then
list = input:split(def) table.foreachi(list,print)elselist = {input}end return list endfunction TI_InnovatorReadCallback(port, error_msg) -- this is the callback function that is defined above and catches the result of a READ command send to the Hub.
rxValue = port:getValue() or '' -- this gets the actual return value from the hub and puts it in the variable rxValue. The user may choose any variable name and also may do any calibration or ranging of the value here. Note that rxValue may be numeric, list or string (hence the utility function list2str) if tonumber(rxValue) then rxValue = math.floor(100*rxValue+0.5)/100 else rxValue = tostring(rxValue) rxValue = str2list(rxValue,string.char(10))[1] end addMsg(hubStrOn) if tonumber(rxValue) then voltage = (rxValue/2^14)*3.3 end -- an example of converting a raw 14 bit ADC value into voltage. screen:invalidate()endfunction TI_InnovatorStateCallback(event)
endaddMsg("TI_InnovatorStateCallback") if 'ready' == event then TI_InnovatorConfig() elseif "disconnected" == event then -- user may choose to do some clean up or display a msg when the Hub is disconnected. addMsg("TI_Innovator Hub disconnected") end screen:invalidate()
function TI_InnovatorConfig() -- this function is called from TI_InnovatorStateCallback() when a ready connection is succesful.
-- place CONNECT and other Hub startup commands here addMsg("TI_Innovator Hub connected")end-- oneShotTimer BEGINS
local timerstart = timer.start local timerstop = timer.stop timer.start = nil timer.stop = nil local currentTimer = nil
local function timerStart(t)
endcurrentTimer = t timerstart(t.period/1000)
local function timerStop()
endcurrentTimer = nil timerstop()
local function setTimer(t)
endif t.period==nil or type(t.period)~='number' or t.period < 10 then error('period in milliseconds >= 10') end timerStart(t) return t
function oneShotTimer(period, listenerHandler, ...)
endif type(listenerHandler) ~= 'function' then
error('createTimerOneShot: function expected')end setTimer {period = period, oneShot = true, listenerHandler = listenerHandler, params = { ... },}function on.timer()
endlocal ct = currentTimer if currentTimer == nil then
timerStop()end if currentTimer.oneShot thencurrentTimer = nil timerStop()end ct.listenerHandler(unpack(ct.params))-- oneShotTimer ENDS
-- TI Innovator BEGINS
TI_Innovator = { }
function TI_Innovator.init(theStateCallback)
endif not pcall(function() require 'asi' end) then
addMsg('Hub NOT available') returnendaddMsg('Hub available')
isASIavailable = true
local HANDSHAKE_GREETING = 'ISTI\n' local HANDSHAKE_ANSWER = 'TISTEM' local portFoundList = { } local state local handshakeState local notifyEvent local asiStateListener local startScanning local stopScanning local portFoundListener local portStateListener local handshake_SendListener local handshake_readListener local handshake_port local TI_Innovator_port local baudRate = asi.BAUD_RATE_DEFAULT local readTimeout = asi.READ_TIMEOUT_DEFAULT
-- User callbacks local stateCallback = theStateCallback local SendCallback local readCallback
function notifyEvent(event)
addMsg('notifying '.. event) if stateCallback thenendstateCallback(event)elseaddMsg('no callback registered')endfunction startScanning()
if isASIavailable thenendasi.startScanning(portFoundListener) notifyEvent('scanning')endfunction stopScanning()
handshake_port = nil portFoundList = { } asi.stopScanning()endfunction asiStateListener(asiState)
if asi.ON == asiState thenendif state == 'active' thenelseif asi.UNSUPPORTED == asiState thenstartScanning()endnotifyEvent(asi.UNSUPPORTED)endfunction portFoundListener(portFound)
addMsg('portFoundListener '.. portFound:getName()) table.insert(portFoundList, portFound) if not TI_Innovator_port and not handshake_port thenendhandshake_port = portFoundList[1] oneShotTimer(100, handshake_port.connect, handshake_port, portStateListener)endfunction portStateListener(reportedPort, event, error_msg)
addMsg('portStateListener '..reportedPort:getName()..' '..event) if asi.CONNECTED == event thenend-- configure port for handshake reportedPort:setWriteListener(handshake_writeListener) reportedPort:setReadListener(handshake_readListener) reportedPort:setReadTimeout(500) handshakeState = 'handshake' -- write handshake greeting addMsg("HANDSHAKE_GREETING: "..HANDSHAKE_GREETING) oneShotTimer(200, reportedPort.write, reportedPort, HANDSHAKE_GREETING)elseif asi.CONNECTING_FAILED == event thenif reportedPort == handshake_port thenelseif asi.DISCONNECTED == event thentable.remove(portFoundList, 1) if #portFoundList>0 thenelseif reportedPort == TI_Innovator_port thenhandshake_port = portFoundList[1] handshake_port:connect(portStateListener)elsehandshake_port = nilendTI_Innovator_port = nil asi.startScanning(portFoundListener)endif reportedPort == TI_Innovator_port thenendif state == 'active' thenendif reportedPort:getState() == asi.DISCONNECTED thennotifyEvent('disconnected')reportedPort:connect(portStateListener)elseTI_Innovator_port = nil asi.startScanning(portFoundListener)endfunction handshake_writeListener(reportedPort, error_msg)
if error_msg thenendaddMsg('handshake_writeListener '..error_msg) returnend if 'handshake' == handshakeState thenreportedPort:read(#HANDSHAKE_ANSWER+2)endfunction handshake_readListener(reportedPort, error_msg)
if error_msg thenendaddMsg('handshake_writeListener '..error_msg) returnend local answer = reportedPort:getValue() if 'handshake' == handshakeState then-- Validate answer if answer and answer:find(HANDSHAKE_ANSWER) thenelseif 'ready' == handshakeState thenaddMsg("HANDSHAKE_ANSWER: "..HANDSHAKE_ANSWER) stopScanning() handshakeState = 'ready' reportedPort:write('BEGIN\n') reportedPort:read(7)elsereportedPort:disconnect() table.remove(portFoundList, 1) if #portFoundList>0 thenendhandshake_port = portFoundList[1] handshake_port:connect(portStateListener)elsehandshake_port = nilendif answer and answer:find('READY') thenend-- Configure port for normal use TI_Innovator_port = reportedPort TI_Innovator_port:setReadTimeout(readTimeout) TI_Innovator.setWriteListener(SendCallback) TI_Innovator.setReadListener(readCallback) -- Notify launchpad is ready notifyEvent('ready')end-- INTERFACE -- BEGINS --
function TI_Innovator.connect()
state = 'active' startScanning()endfunction TI_Innovator.disconnect()
state = 'inactive' if isASIavailable thenendif TI_Innovator_port thenendTI_Innovator_port:disconnect() TI_Innovator_port = nilend stopScanning()function TI_Innovator.setWriteListener(newWriteCallback)
writeCallback = newWriteCallback if TI_Innovator_port thenendTI_Innovator_port:setWriteListener(writeCallback)endfunction TI_Innovator.setReadListener(newReadCallback, newReadObject)
readCallback = newReadCallback if TI_Innovator_port thenendTI_Innovator_port:setReadListener(readCallback)endfunction TI_Innovator.setBaudRate(newBaudRate)
baudRate = newBaudRate if TI_Innovator_port thenendTI_Innovator_port:setBaudRate(baudRate)endfunction TI_Innovator.setReadTimeout(newReadTimeout)
readTimeout = newReadTimeout if TI_Innovator_port thenendTI_Innovator_port:setReadTimeout(readTimeout)endfunction TI_Innovator.Send(data)
if not TI_Innovator_port thenendaddMsg('No Hub attached') return 'No Hub attached'end local result = TI_Innovator_port:write(data .. '\n') if result then addMsg(tostring(data)'): '.. tostring(result)) else addMsg(tostring(data)')') end return resultfunction TI_Innovator.Read(bytes_to_read)
addMsg('TI_Innovator.Read') if not TI_Innovator_port thenendreturn "No TI Hub attached"end return TI_Innovator_port:read(bytes_to_read)function TI_Innovator.request(request)
if not TI_Innovator_port thenendreturn "No TI Hub attached"end local result = TI_Innovator_port:write(request .. '\n') if result then addMsg('write(tostring(request)'): '.. tostring(result)) else addMsg(tostring(request)')') end result = TI_Innovator_port:read() addMsg('read() '.. tostring(result)) if result thenaddMsg('Error sending request: ' .. tostring(request))end return resultfunction TI_Innovator.isConnected()
if not TI_Innovator_port thenendreturn falseend return TI_Innovator_port:getState() == asi.CONNECTEDfunction TI_Innovator.getName()
if not TI_Innovator_port thenendreturn "No TI Hub attached"end return TI_Innovator_port:getName()function TI_Innovator.getIdentifier()
if not TI_Innovator_port thenendreturn "No TI Hub attached"end return TI_Innovator_port:getIdentifier()-- INTERFACE -- ENDS --
-- Wait for the ASI to be up and running
asi.addStateListener(asiStateListener)
end
Home ← STEM HQ ← TI-Nspire Authoring ← TI-Nspire Scripting HQ ← Scripting Tutorial - Lesson 41