Home ← TI-Nspire Authoring ← TI-Nspire Scripting HQ ← Scripting Tutorial - Lesson 7
Scripting Tutorial - Lesson 7: Quick Start: Working with Images
Download supporting files for this tutorial
Download this page in PDF format
Texas Instruments TI-Nspire Scripting Support Page
Many, many thanks to Adrien Bertrand for his help in preparing this lesson - he provided timely advice to make this a much better tutorial and helped me find my out of the tangled mess that I got myself into!
Lua has quite powerful but simple image manipulation commands, making it easy to import images into your Lua document and to actually "play" with these. While TI-Nspire 3.0 supports inserting images into TI-Nspire documents, there are as yet no options for interacting with these - making them change size, or even appear and disappear on the fly. This functionality is available using Lua.
Lesson 7.1: Setting up and Displaying your Image
Prior to APIlevel 2.3, images were entered directly into a script as a converted string. These tended to be long and memory expensive, especially if the image was used more than once within a document.
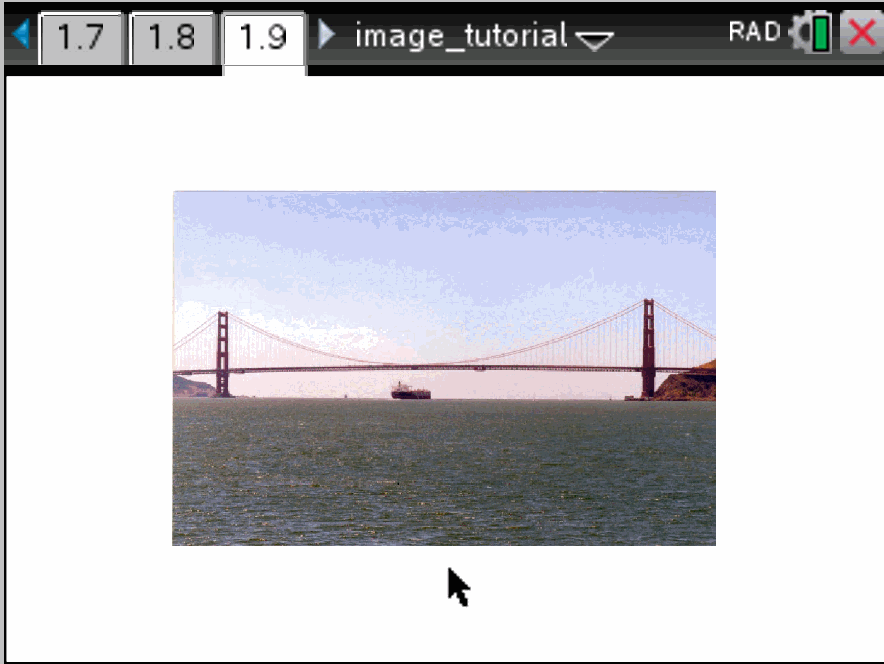
As of APIlevel 2.3, images are handled as document resources - you may or may not have noticed that the lower section of the TI-Nspire Script Editor consists of several tabs: the Console (where script authors spend most fo their time), Globals, Callstack, Locals and Resources. At this time, the only resources which the Script Editor handles are images. Most common image formats are supported (JPG, PNG, TIFF, ...). Just click the "+" button, locate the image to be inserted (here we use images called bridge1, bridge2, bridge3 - all are JPEGs), and give a name for that image within your script - you can choose whether to retain the original name or give it a new one.
Once the image is inserted, it must be defined within the script, as shown. Note the format for resource handling: the image name is preceded by "_R.IMG.".
bridge1 = image.new(_R.IMG.bridge1)
NOTE: Although you must re-enter images each time they are required for a new script/page, only a single copy of that image is stored within the document! This reduces the overall document size significantly compared to the previous method, where the long image strings were repeated on every script. So commonly used repeated images (button images, for example) must be re-entered in the Resources tab each time they are used, but they are stored only once in a document.
Now all we have to do is to tell the script to "paint" the image to the screen, using the now-familiar on.paint function, along with the simple drawImage command. If we have defined the image as a variable called bridge1, then displaying it is achieved using the code shown here:
function
gc:drawImage(bridge1, 0, 0)end
That is actually the heavy lifting done. Everything else just builds on previous lessons to "tweak" our image display - to ensure that it fits the window, for example, to center it in that window, and even to control scale and to change images dynamically!
I would point out that the approach used here is not the most efficient but is a suitable starting point only. You will observe in the scripts that follow that the image.copy command is used within an on.paint function. For large images or multiple images, this is likely to slow down performance, especially on the handheld. However, for simple cases like those shown here, it will suffice. The better approach is to link the copy command to the event that triggers it - on.resize, or on.arrowKey, or on.varChange. These approaches are not included at this stage.
We encountered the window dimension commands way back in tutorial 1: platform.window:width and platform.window:height. In our example, these may be used to center the image on the window, along with the equivalent dimension commands for images: image.width(image) and image.height(image). Study the code and make sure everything makes sense.
Note particularly the way that the image is centered on the window.
local screen = platform.window local w, h = screen:width(), screen:height() local bridge1 = image.new(_R.IMG.bridge1)<>/P>
function on.paint(gc)
local imw = image.width(bridge1) local imh = image.height(bridge1)gc:drawImage(bridge1, (w - imw)/2, (h - imh)/2)
end
This is great if our image fits reasonably well to the window. But what if it is too big, or too small? For this we create a copy of the image that is scaled.
The simplest method here is to force the image to fit within your screen dimensions: we have measured these as "w" and "h", so we can create a copy of the original image that will fit easily in this space: image = image:copy(w, h) will create a copy of the image that fits exactly to your screen.
Note that we do this scaling within the on.resize function, rather than the on.paint function. The paint function is called constantly while focus is on that page or window; the resize function is called once when the page is set up, and then only when resized (which, in the case of handheld and iPad will not generally happen!). Scaling an image can impact upon performance, especially on handheld and for larger images, so it is recommended that this occurs just when required.
local screen = platform.window local w, h = screen:width(), screen:height() local imw, imh
function on.resize()
w, h = screen:width(), screen:height() bridge1 = bridge1:copy(w, h) imw = bridge1:width() imh = bridge1:height() screen:invalidate()
end
function on.paint(gc)
gc:drawImage(bridge1, (w - imw)/2, (h - imh)/2)
end
So far so good. You could stop here and be able to insert an image and play around with the scale until it fits nicely. Nicer, though, would be to be able to change that scale on the fly - perhaps by using the arrow keys as we learned in the last lesson!
Study the code opposite.
Defining any variables used generally ("global" variables) as local to the script is actually good practise - it is more memory efficient than just leaving them as global. Here we define the image variable that we will be using so that it occurs just once when the script is loaded.
The resize function is also generally called just once, so this is a good place to initialise our variables, and to resize our image so that it fits on the screen (I also like to link the resize function to the escapeKey to serve as a reset function). If the dimensions of the image are different from those of the screen, this may cause some distortion. If this is a problem, then you may need to resize more carefully than just defining the image width as half the screen width, and image height as half the screen height.
Next, define a "rescale" function which can be called as required. It defines a "display image", copied from our image, but adjusted according to the value of "scale". It also defines values for this new image width and height. Note that this function takes as arguments the image being rescaled, and the current value of scale. It also includes some safety checks to stop the image from getting too big or, more importantly, too small!
Observe, too, that our "rescale" function includes a screen:invalidate() command, so this does not need to be repeated where the main function is used.
local screen = platform.window local w, h, scale, displayImage, imw, imh local bridge1 = image.new(_R.IMG.bridge1)
function on.resize()
w, h = screen:width(), screen:height() scale = 1 bridge1 = bridge1:copy(0.5*w, 0.5*h) rescale(bridge1, scale)
end
function rescale(image, scale)
endif scale > 0.1 and scale < 4.9 then
displayImage = image:copy(scale * image:width(), scale * image:height()) imw, imh = displayImage:width(), displayImage:height()end screen:invalidate()function on.escapeKey()
on.resize()endfunction on.arrowKey(key)
endif key == "up" then
if scale < 4.9 then scale = scale + 0.1 endelseif key == "down" thenif scale > 0.1 then scale = scale - 0.1 endend rescale(bridge1, scale)function on.paint(gc)
endgc:drawImage(displayImage, (w - imw)/2, (h - imh)/2)
This script will work well on the TI-Nspire handheld, and on the desktop software, but what about the iPad? No arrow keys means that we have no way to change the scale.
A simple solution is to add a slider, and use this variable to change our scale.
To add this feature, we need to make just two changes to our script:
We need to "listen" for changes in the slider variable (which we will call "scale").
We need to send our arrow key changes to the slider.
To listen for a change to an Nspire variable, we use var.monitor and on.varChange(). The first of these functions tells the script to listen for that variable name. The second tells what to happen if there is a change in the variable being monitored. Here, we will grab the new value of scale using var.recall and use it to set the current value of scale for our script (Note that these do NOT need to have the same name). Then we just run our rescale function to make this change to our image.
It also makes sense to have arrowKey changes in our script reflected in changes to the outside variable (and its slider). For this we make two changes to our on.arrowKey function. Begin by grabbing the current value of scale, and end by writing the new scale value using var.store.
var.monitor("scale")
function on.varChange()
endscale = var.recall("scale") or scale rescale(bridge1, scale)
function on.arrowKey(key)
endscale = var.recall("scale") or scale
if key == "up" then
if scale < 4.9 then scale = scale + 0.1 endelseif key == "down" thenif scale > 0.1 then scale = scale - 0.1 endend rescale(bridge1, scale) var.store("scale", scale)Now you can control the scale using the up and down arrow keys or a slider!
Our final tweak is to define several images and use the left and right arrow keys to switch between these! Back to the Scripting Tool and add a couple of other images - I am using the stock bridge images that are installed in your TI-Nspire Images folder when it was installed. I define these as bridge2 and bridge3.
As we just did for the scale, we define the left and right arrow keys to increment the values of our variable choose and refer to it in the Lua script as choose. Note the use of the "%" to calculate the remainder when the value is divided (in this case, by 3). this allows the values to cycle- no matter how large or small the value, it remains between 0 and 2.
You can also create a slider variable, called choose in a Geometry window, and set it to run from 1 to 3.
Congratulations! You now have all the ingredients you need to digitize, define, insert, scale and manipulate images using Lua. Our final lessons in this sequence will look at creating your own graphics using Lua.
local screen = platform.window local w, h, choose, scale, displayImage, imw, imh local images = { image.new(_R.IMG.bridge1), image.new(_R.IMG.bridge2), image.new(_R.IMG.bridge3) }
var.monitor("scale") var.monitor("choose")
function on.varChange()
endscale = var.recall("scale") or scale choose = var.recall("choose") or choose rescale(images[choose], scale)
function on.resize()
w, h = screen:width(), screen:height() scale = 1 choose = 1 for k = 1, #images do
images[k] = images[k]:copy(0.5*w, 0.5*h)end var.store("scale", scale) var.store("choose", choose) rescale(images[choose], scale)end
function rescale(image, scale)
endif scale > 0.1 and scale < 4.9 then
displayImage = image:copy(scale * image:width(), scale * image:height()) imw, imh = displayImage:width(), displayImage:height()end screen:invalidate()function on.escapeKey()
on.resize()endfunction on.arrowKey(key)
endscale = var.recall("scale") or scale if key == "up" then
if scale < 4.9 then scale = scale + 0.1 endelseif key == "down" thenif scale > 0.1 then scale = scale - 0.1 endelseif key == "right" thenchoose = (choose + 1) % 3 + 1elseif key == "left" thenchoose = (choose) % 3 + 1end var.store("scale", scale) var.store("choose", choose) rescale(images[choose], scale)function on.paint(gc)
endgc:drawImage(displayImage, (w - imw)/2, (h - imh)/2)
If you have multiple images to add to your document, there is a quick and easy way to do this. Suppose we have the images bridge1.jpg, bridge2.jpg and bridge3.jpg in a folder called, say, script7. On my Mac, I placed this folder in the Pictures folder for convenience.
Create an excel spreadsheet and in column A, enter the names of each image (without the suffix): so bridge1 is in cell A1, bridge2 in cell A2 and bridge3 is in A3.
Column B has the path name for each image. On the Mac, this will take the form of:
/Users/Steve/Pictures/script7/bridge1.jpg, and so on (as shown). The path name for Windows users will be slightly different.
Save this document in CSV format (comma separated value) and now go to the Resources tab of the Script Editor. Instead of adding an image file, add the spreadsheet and all three images will be added instantly!
A prepared spreadsheet and accompanying images for this tutorial is included within the zipped file for this lesson.
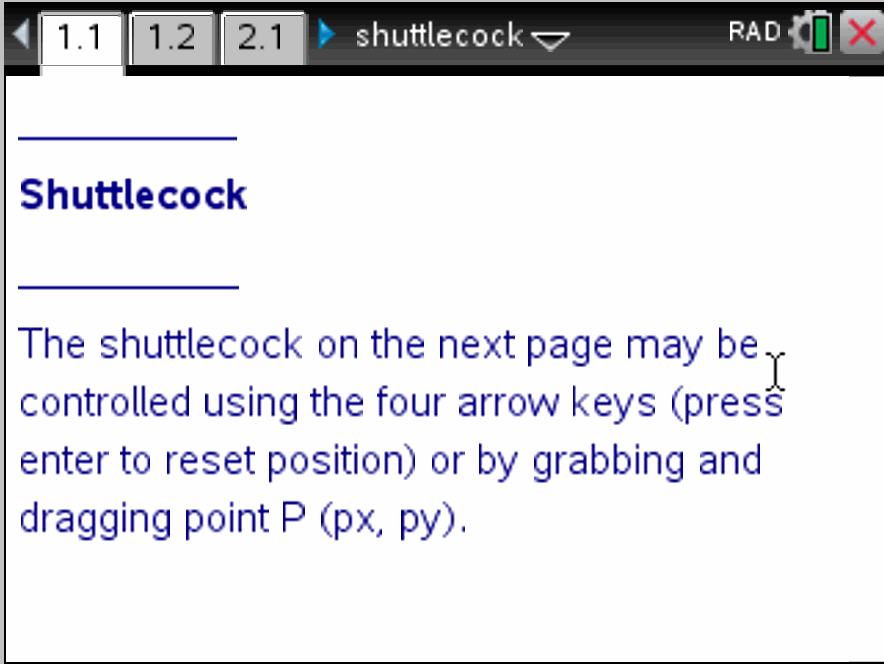
What if you want to move the image around on the screen? While this can be done entirely within Lua using the arrow commands as described previously, another neat option might be to split the window, place a Graph window underneath, and control the image by moving a point around on the Graph window. To do this, store the x- and y-coordinates of the point (say px and py) and then use these with your arrow commands in Lua to move the image.
This is demonstrated in the shuttlecock.tns file that is included with this lesson's downloads. Included too you will find the image that was used and the Lua script for you to study. In problem 2 of this TNS file, the point P is linked to a parabola so that the motion of the shuttlecock can be modelled and even animated!
Next we learn how to use Lua's own graphics capabilities to create our own images.
Home ← TI-Nspire Authoring ← TI-Nspire Scripting HQ ← Scripting Tutorial - Lesson 7