Home ← TI-Nspire Authoring ← TI-Nspire Scripting HQ ← Scripting Tutorial - Lesson 6
Scripting Tutorial - Lesson 6: Quick Start
Download supporting files for this tutorial
Download this page in PDF format
Texas Instruments TI-Nspire Scripting Support Page
Before we launch into Lua graphics, it is worthwhile taking a moment to see how Lua can readily interface with TI-Nspire's own graphics. In this Quick Start activity, you will create a script that controls the movement of a linked coordinate point around the cartesian plane using just the arrow keys of your device or your computer keyboard.
Lesson 6.1: Setting up the Graph Window
|
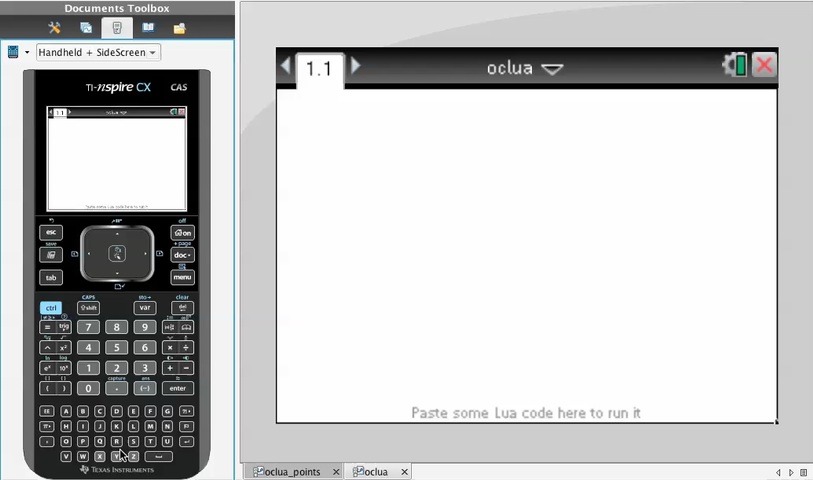
Because this is a Quick Start, we will use the wonderful TIDE.tns document to quickly and easily create and test our script right within TI-Nspire. In the lesson documents downloadable from the link above, you will find a blank read-only TIDE document, as well as the completed version. Remember: create your script in the first page of the TIDE document and it will be automatically run on page 1.2.
Begin by splitting page 1.2 horizontally and inserting a Graph window on the bottom. Turn on the Grid and place a point on a grid point. Right-click on this point and choose to show Coordinates & Equations. Right click on the x-coordinate and Store it as, say, px. Store the y-coordinate as py. You are ready to go!
|
|
Lesson 6.2: Using the Arrow Keys
|
I don't know about you, but I still find it a nuisance to have to go into a Graph page and grab a point to drag it around. I have used all sorts of alternatives, particularly setting up a controlling slider and then tabbing onto the slider, pressing enter, and then using my arrow keys to control the slider. The method described here makes this even easier - the arrow keys will automatically control the movement of your point around the window.
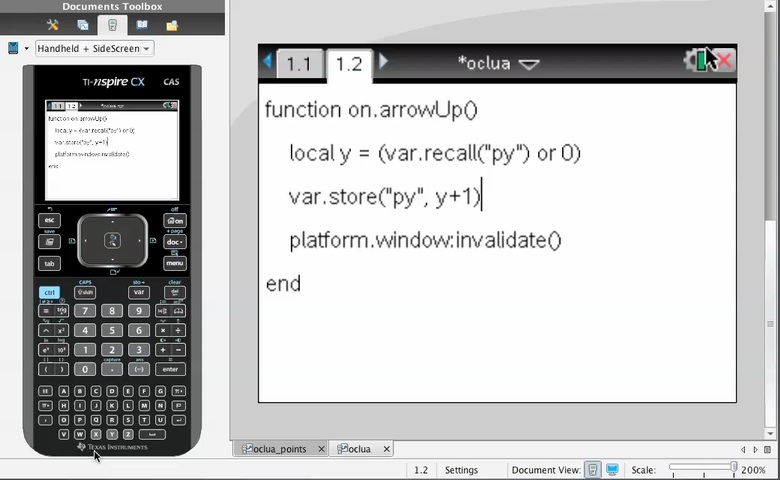
Go back to a blank TIDE document and type the following script:
function on.arrowUp()
local y = (var.recall("py") or 0)
var.store( "py", y+1)
end
|
|
Study this script. The Lua page looks for (recalls) the variable py in TI-Nspire's symbol table and stores it locally as y. If it doesn't find it, then the value of 0 is substituted for y.
Then Lua writes the current value plus 1 back to py, moving the coordinate point up one unit.
It is usually a good idea (especially when working on the handheld) to refresh the screen when you make changes. This is done by adding the following line:
function on.arrowUp()
local
y = (var.recall("py") or 0)
var.store(
"py", y+1)
screen:invalidate()
end
Copy and paste this script three more times, and adjust for arrowDown (y - 1), arrowLeft (x - 1) and arrowRight (x + 1). NOTE the case sensitive commands!
For an even simpler option, you could pull these together into a single function:
function on.arrowKey(key)
if
key == "down" then
local
y = (var.recall("py") or 0)
var.store(
"py", y-1)
elseif key == "up" then
local y = (var.recall("py") or 0)
var.store("py", y+1)
elseif key == "left" then
local x = (var.recall("px") or 0)
var.store("px", x-1)
else
local x = (var.recall("px") or 0)
var.store("px", x+1)
end
screen:invalidate()
end
And, finally, what if you are working on a platform that has no arrow keys, such as the Player?
There will be much more on this when we introduce classes, but as a quick alternative, you could easily create "hot zones" on your page which respond to a command such as on.mouseUp() (or on.mouseDown()).
function on.mouseUp(x, y)
if
y < 0.2*h then
on.arrowKey("up")
elseif
y > 0.8*h then
on.arrowKey("down")
elseif
x < 0.2*w then
on.arrowKey("left")
elseif
x > 0.8*w then
on.arrowKey("right")
end
screen:invalidate()
end
Lesson 6.3: Fine Tuning
It is worth mentioning at this point that once you begin to develop scripts that involve really any sort of changes to the window, then the screen refresh rate of the handheld may need some help. Scripts that run perfectly well on a computer may fail to refresh appropriately on the handheld, since it has a much simpler operating system with fewer signals and triggers happening in the background. Generally, you will need to include a platform.window:invalidate() command for any function that causes a visible change. For many documents you develop, it may not be a bad idea to begin by defining the following two functions:
function on.construction()
timer.start(
1/5)
end
function on.timer()
screen:invalidate()
end
Can you see what these might do? The first begins a timer as soon as the page is created, and sets it to tick over 5 times a second. The second refreshes the window in the usual way each time the timer ticks over! All this happens in the background but as you could imagine, neatly and quietly refreshes the screen as often as you desire. Of course, for really intensive scripts, this may cause a performance hit, so use with care.
That is all there is to it! I would suggest three additional ideas:
Store the x-tick and y-tick values on the axes, and use these instead of 1 for the units of movement.
You can easily set the enterKey to do something useful as well - in the examples included, I use on.enterKey() to send the point back to the origin.
Use Page Layout > Custom Split to drag the top window up as far as it will go. Because it is in the first position, on entering the page, focus will still be on this window and your arrow keys will work automatically. Of course, you can still click in the Graph window and grab and drag the point around if desired.
Alternatively, leave the Lua window visible as the top half of the page, and use what we have learned previously to place informative text in it. This might be the coordinate values, or the current quadrant, or some other relevant property.
These ideas have been implemented in the example included in the downloadable support files for this lesson.


The next lesson will look at how Lua handles images.
Home ← TI-Nspire Authoring ← TI-Nspire Scripting HQ ← Scripting Tutorial - Lesson 6


