Home ← TI-Nspire Authoring ← TI-Nspire Scripting HQ ← Scripting Tutorial - Lesson 29
Scripting Tutorial - Lesson 29: Lua Objects Gallery
Download supporting files for this tutorial
Download this page in PDF format
Texas Instruments TI-Nspire Scripting Support Page
This tutorial is all about NOT re-inventing the wheel!
Lua is a powerful and flexible scripting tool. With a little imagination and a lot of effort, it can be persuaded to do almost anything, within reason. However, the amount of effort required to do even the most common things is sometimes more than many teachers can afford. Having to define all your own page elements - even frequently-used objects like buttons, sliders, grids, etc - is a deterent to those who want to get their teaching ideas in the hands of their students as quickly and efficiently as possible.
The Lua Objects Gallery is a collection of these common objects, defined in a way that those with moderate experience of Lua scripting may copy and paste the code into their own scripts, and then adapt as needed.
The first page of the Lua Objects Gallery TNS file (shown in the video displayed here) is a collection of many of the most useful of the gallery objects, showing how these may be inserted and made to work together to achieve quite effective results.
1. Buttons and Sliders and Grids...
The Lua Objects Gallery offers a collection of objects, like those shown here - buttons, sliders, dropdown menus and more. The scripts for these objects are structured so that the user can copy and paste required snippets into their own code, then adapt as required for their own purposes.
Each script begins with an outline of the code, including line numbers, making it easy for the user to jump directly to the relevant sections (using ctrl-g).
For example, the Button script begins as follows (and all scripts follow a similar format):
-- Section 1 (Line 20): Initial values
-- Section 2 (Line 60): Define instances and layout (resize and paint)
-- Section 3 (Line 115): Actions
-- Section 4: (Line 160): Define menus
-------------------------------------------------------------
-- Section 5 (Line 180): Define class for Buttons
-- Section 6: (Line 370): General Mouse and KeyBoard Controls
-------------------------------------------------------------
Use Case 1: Suppose you have a simple script which only requires a single object (in this case, a button). The button will perform some action, and all the rest is just layout.
In such a case, the user might simply copy and paste the entire script, and adapt as required. The first part of the script (sections 1 - 4) will be the only parts that generally need to be edited. What follows after the line following section 4 is general code that defines a button and the way it will work on your page (including mouse and keyboard commands optimised for handheld, iPad and computer).
As indicated by the section information, the user will adapt and define initial values, placement on the page and appearance, and then the action that is desired for the button. Finally, the menu can be customised as required.
Use Case 2: More commonly, the desired script will contain multiple objects: perhaps two or more buttons, a drop down menu, a text box and more. For such a case, begin with any one of the Lua Objects Gallery scripts (if using multiple occurrences of one object, then it would make sense to use that as the base).
Now the process of building a Gallery script begins, and will generally involve four steps.
Classes:: I generally begin by copying and pasting the code for each of the classes that you will require. Note from above that these will be found following the divider line shown. The class definitions generally include: init, contains, paint and often mouse commands. In most cases, these will not need to be edited, unless the user wants to change particular aspects of appearance or functionality.
Instances: Next, I define instances for each of the required objects. These will be found in the on.resize function, and will include a brief description of the syntaxfor that object. For example, the button in the example shown is defined as follows:
local width = 0.6*w
local height = 0.2*h
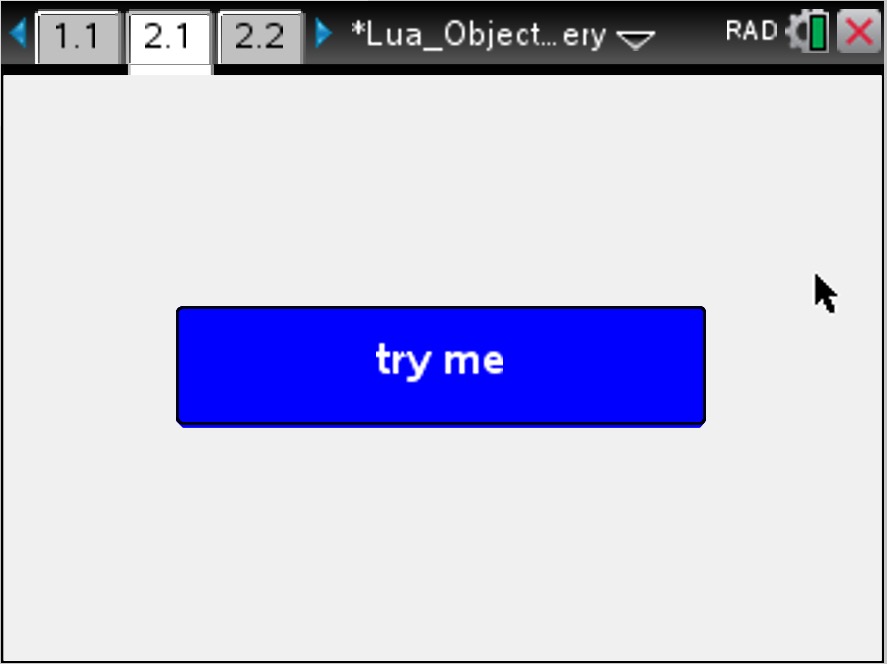
myButton = Button(w/2 - width/2, h/2 - height/2, width, height,
bluebutton, myColor, 'try me', 0.05*height, buttonAction, false, true, true)
--x, y, width, height,
--image, mycolor, label, curvature, action, selected, isVisible, draggable
Note options for curvature of the button (this will not affect an image but will affect a painted button), and even whether the button is to be draggable. Such functionality may be easily turned on or off in this way.
Required Variables: You will notice references to "bluebutton" and "myColor" - these will need to be defined prior to this step, either in the initial section of the script, or in the earlier part of the on.resize() function, depending upon whether these are likely to be defined just once, or whether they might vary throughout the script. For example, if a button image is used, it will likely be defined just once, whereas the color of the button might well change depending on the actions defined.
Actions:The reference to "buttonAction" points to a defined function which captures the effect you desire for that object. You will find a function such as this in most of the Gallery scripts, and this action is linked automatically to mouse and keyboard actions later (in the section you don't need to worry about!) This should make it easy for you to implement your object - define what you wish it to do in the "actions" code and this should then work when you use the object.
Included in the "actions" section (section 3 of the example above) you will also find specific functions that you will need to define. For different objects, these may include certain keys (like escape, tab and enter). For the button script, I included the tabKey (which turns images on and off) since you might wish to define it in some other way.
I also think of the menu definition at this point, since it will also tend to be idiosyncratic to your own needs.
Click on each image to play with this script object...
Button(x, y, width, height, image, mycolor, label, curvature, selected, isVisible, draggable)

Slider(sx, sy, length, value, action, from, to, units, label, orient, mycolor, visible)

dropDown(dropX, dropY, dropWidth, dropHeight, button_image, myColor, label, dropList, dropDownAction, draggable)

PlayReset(grabx, graby, width, height, playActions)
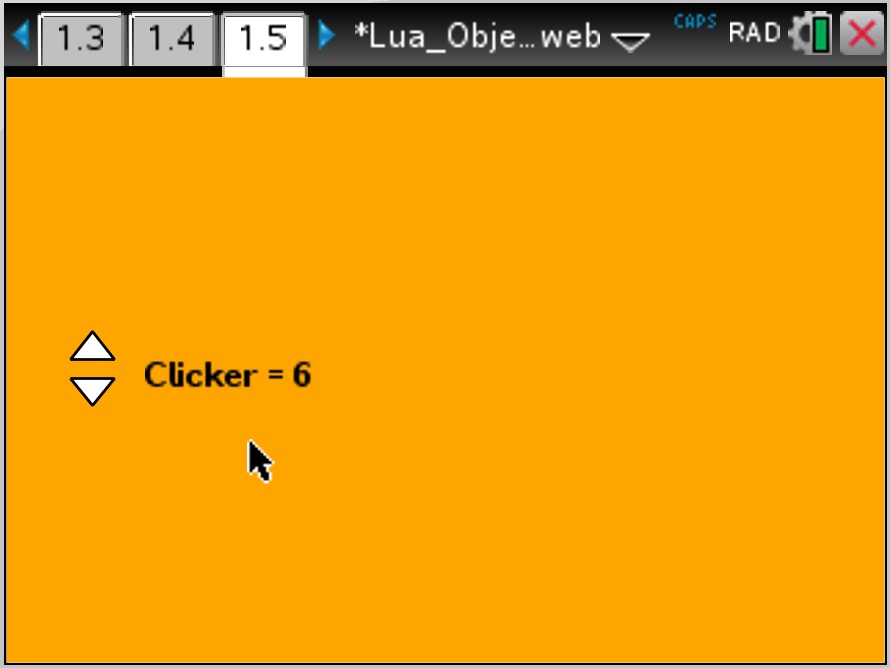
Clicker(x, y, width, height, action, label, units, initial_value, step, minimum, maximum, isVisible, isDraggable)

checkBoxt(x, y, width, label, actions, selected)
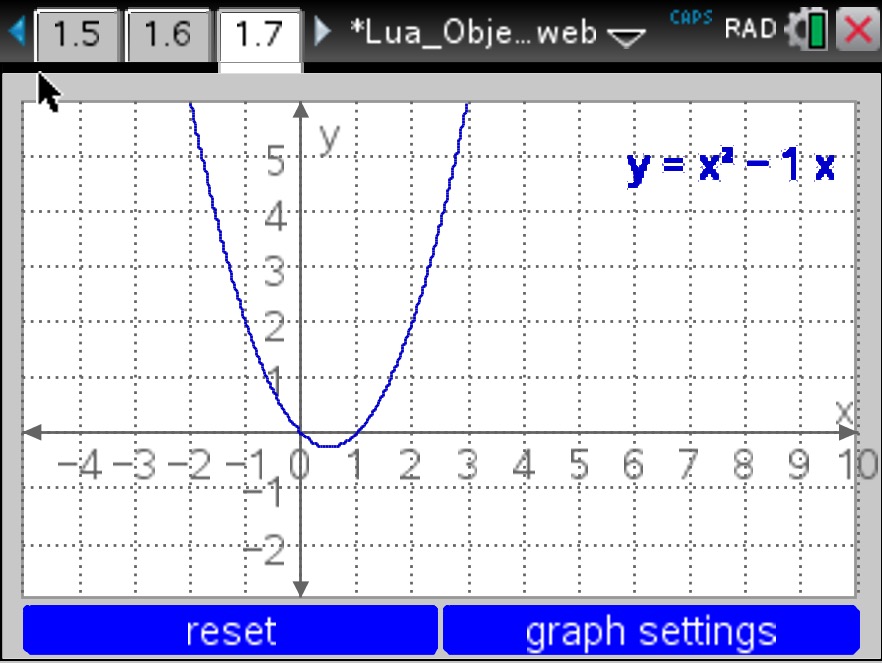
Grid(x, y, width, height, xMin, xMax, yMin, yMax, xTick, yTick, text, xtext, ytext, square)
In addition to these, the Gallery consists of scripts for text boxes, help windows and timers.
-- BLE General Functions -----------
Now it is time for you to play!
The images for the various objects above each link to a page where the script has been defined within your web browser. Click on the "run your code" button towards the top of the page, and the script in the text box at the end will be run. This means you are free to browse the script, try some changes and run these immediately. If you are using a tablet, you might find the scripts take a few seconds to load, but they will, so you can play and edit on iPad or any device that supports javascript.
Of course, a web browser (while convenient as a first stop) is not an ideal authoring environment, so download the Lua Objects Gallery tns file and use the TI-Nspire Script editor or your own preferred editor to explore.
In addition to the main document (Lua_Objects_Gallery.tns) the zipped file contains a couple of other documents, for those who might like to explore further:
Lua/JavaScript: Lua_Objects_Gallery_web.tns contains the simpler scripts that will run within the browser (featured above). The Lua/JavaScript translation does not at this stage work with string manipulation, and anything above APIlevel 1.0, so some nice features are not possible in this space. But you may be surprised by what IS possible!
For more on these possibilities, visit the Lua and JavaScript page.
Remote Libraries: Since we are using and reusing the same code snippets for multiple documents, I wondered if it might be possible to "share" the code, and access it remotely. Using the MyLib folder and some neat public variables definition, it turns out that it is! Take the file 'LuaLib.tns' and drop it into your MyLib folder on computer (in the Documents > TI-Nspire folder), on handheld, or on the iPad (go to settings and Show MyLib). Now open the file Lua_Objects_Gallery_remote.tns - you may need to refresh libraries, but you should be then able to run your Gallery objects just as if they were fully defined locally. Check the scripts and compare these to the local definitions: often reduced from 800-1000 lines down to a couple of hundred! Interesting, but may have no practical use at all. Feel free to explore...
I have attempted to annotate the scripts thoroughly (without being excessive). This hopefully will help you in learning how to use these objects for yourself. If you run into problems, or just wish to chat about using the Gallery, feel free to drop me an email - steve@compasstech.com.au. I would love to hear from you!
Something New: Control your iPad Scripts Remotely using a TI SensorTag and BLE
How would you like to control your scripts remotely, with just clicks of a button? The good news is that this is surprisingly easy to do, involving adding just a few additional lines to your existing scripts.
The TI SensorTag 2.0 offers amazing opportunities for mathematics and science STEM classroom applications. For less than $USD30 this device literally puts real world data collection in the palm of your hand, as well as BLE control functionality in a range of applications.
The TI SensorTags come with what are termed "Simple Keys" - we will refer to these as "left" and "right" keys. The SensorTag 2.0 (or CC2650 SensorTag) has only two buttons, found on the sides. Facing the two strip windows, the left side button also serves to turn the device on and off, but this actually requires a 3-second keypress. The right side button will switch to iBeacon mode after 6 seconds, and reset the device after 10.
These devices use the same broadcast signal (UUID) and transmit the same information when the left and right buttons are pressed. It is a simple thing to take this information and define actions for these events, turning your Tag into a remote control for your script. This has been done with most of the Lua Objects Gallery scripts.
The best documents for this treatment are probably those that work best on the handheld, surprisingly. This method easily converts enter key, escape key, tab key, even arrow keys, into button clicks.
When not in a BLE-enabled platform (at present just the iPad), there is no evidence that this code exists. But it comes to life in the iPad apps, with Bluetooth turned on. Tapping at the top of the page begins scanning, and connection when an active SensorTag or other supported BLE device (such as the CC2650 LaunchPad, or a LaunchPad with BLE support) is found. A few seconds later, and the buttons are ready to work.
So how do I do this?
Change your APIlevel to 2.5: platform.apilevel = '2.5'
Copy and paste some initial variables at the start of your script:
pcall(function () require 'bleCentral' end) local bleState = '' local bleStatus = 'Tap here to scan for BLE' local peripheralName = '' local keysRead = 'FFE1' local BLEready = 0 local keyPress = nil
Copy this snippet into your on.resize() function (or on.construction):
if not bleStatus:find("Connect") then
pcall(function() ble.addStateListener(listenerCallback) end)
end
(Optional) You may copy this snippet into your on.paint() function. It will be visible in BLE-active platforms (iPad) but not elsewhere.
fontSize = math.floor(w/42 + 0.5) if platform.isDeviceModeRendering() then
fontSize = fontSize > 6 and fontSize or 7 fontSize = fontSize < 24 and fontSize or 24end local radius = 0.05*hif bleState:find("ON") then
gc:setColorRGB(color.gray) gc:setFont("sansserif", "b", fontSize) local str = bleState..": "..bleStatusendif bleStatus:find("Connect") then
if BLEready ~= 0 thenendgc:setColorRGB(color.green) str = peripheralName .." connected"elsegc:setColorRGB(color.blue) str = "Connecting: Try your "..peripheralNameendgc:fillArc(0.015*w, 0.025*h, radius, radius, 0, 360) gc:drawString(str, radius + 0.0275*w, 0.025*h + radius/2, "middle") gc:setColorRGB(color.black) gc:drawArc(0.015*w, 0.025*h, radius, radius, 0, 360)
If you already have a mouseUp function, insert the if-then block, else copy and paste directly:
function on.mouseUp(x, y)
if x < 0.5*w and y < 0.1*h then
if bleStatus:find("Tap") thenendperipheralOn()elseperipheralOff()endscreen:invalidate()
end
Copy the following block of code at the end of your script:
bleCentral.startScanning(callbackScan) bleStatus = 'Scanning' screen:invalidate()function listenerCallback(state, scriptError)
if state == ble.ON then bleState = 'BLE ON' elseif state == ble.OFF then bleState = 'BLE OFF' peripheralOff() elseif state == ble.RESETTING then bleState = 'BLE RESET' elseif state == ble.UNSUPPORTED then bleState = 'UNSUPPORTED' if scriptError then print('Error message: BLE not supported') end end
screen:invalidate()
end
function peripheralOn()
end
function peripheralOff()
bleCentral.stopScanning()
if myPeripheral then myPeripheral:disconnect() endbleStatus = 'Tap here to scan for BLE' peripheralName = '' BLEready = 0 screen:invalidate()
end
function callbackScan(peripheral)
if peripheral ~= nil then peripheralName = peripheral:getName() or 'Unknown Device'
if peripheralName thenif peripheralName:find('Tag') or peripheralName:find('LaunchPad') or peripheralName:find('HMSoft') or peripheralName:find('BT05') or peripheralName:find('CC41') thenperipheral:connect(callbackConnect)
end
end
end
screen:invalidate()end
function callbackConnect(peripheral, event)
if event == bleCentral.CONNECTED then
bleCentral.stopScanning() bleStatus = 'Connected' myPeripheral = peripheral peripheralName = peripheralName:gsub('(unsupported)', '') peripheral:discoverServices(callbackServices)
elseif event == bleCentral.DISCONNECTED then bleStatus = 'Disconnected' peripheralName = ''
end screen:invalidate()
end
function callbackServices(peripheral)
if peripheral ~= nil and peripheral:getState() and peripheral:getState() == bleCentral.CONNECTED then
local services = peripheral:getServices() for _,service in ipairs(services) do service:discoverCharacteristics(callbackCharacteristics) end
end
screen:invalidate()
end
-- BLE Specific Functions ---------
function callbackCharacteristics(service)
local characteristicsList = service:getCharacteristics()
for _,characteristic in ipairs(characteristicsList) do
if characteristic:getUUID() == keysRead then
characteristic:setValueUpdateListener(callbackCharacteristic) characteristic:setNotify(true)
end
end
end
function callbackCharacteristic(characteristic)
if characteristic:getUUID() == keysRead then
--Simple Keys
local value = characteristic:getValue() if value then BLEready = 1 if peripheralName:find('Tag') or peripheralName:find('LaunchPad') then
keyPress = ble.unpack("u8",value)elsekeyPress = value:gsub("P", "") keyPress = keyPress:gsub(" ","") keyPress = tonumber(keyPress)endif keyPress and keyPress == 2 then on.enterKey() end if keyPress and keyPress == 1 then on.escapeKey() end
end
end
screen:invalidate()
end
You may choose to add more explanatory text to your screen, and to add to your menu, but these steps are optional. This code should make your script BLE ready. The magic happens in the last two lines (in red). Set whatever action you choose to the left and right button presses of the SensorTag, and you are away! You can even use long and short presses for different actions - check this in Lua Objects like the slider.
Home ← TI-Nspire Authoring ← TI-Nspire Scripting HQ ← Scripting Tutorial - Lesson 29
