Home TI-Nspire Authoring TI-Nspire Scripting HQ Scripting Tutorial - Lesson 18


Scripting Tutorial - Lesson 18: Tips and Tricks III

Download supporting files for this tutorial

Download this page in PDF format

Texas Instruments TI-Nspire Scripting Support Page


Adding Your Own Menu

With thanks to Marc Garneau and Andy Kemp

The option to add your own customized menus offers quite significant functionality to Lua documents (although be warned that such menus will not be visible in the Document Player).

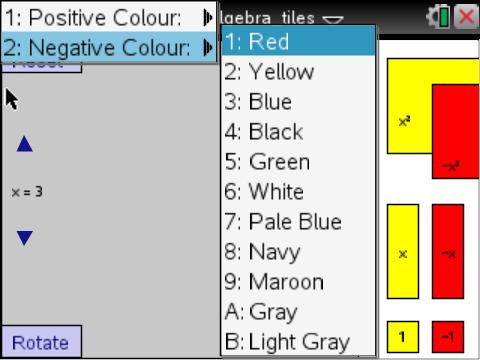
In the example shown here (borrowed shamelessly from Marc and Andy) there are two types of objects - positive and negative. The menu choices allow the user to set the colors for each. Begin by defining a function which actually supports such a choice. Then the menu function takes care of the definitions. Finally, the toolpalette.register makes the magic happen!
function choosecolour(kind,clr)

if kind == "pos" then

poscolour=clr

else

negcolour=clr

end

reset()

platform.window:invalidate()

end

menu={

{"Positive Colour:",

{"Yellow", function() choosecolour("pos","yellow") end},

{"Red", function() choosecolour("pos","red") end},

{"Blue", function() choosecolour("pos","blue") end},

{"Black", function() choosecolour("pos","black") end},

{"Green", function() choosecolour("pos","green") end},

{"White", function() choosecolour("pos","white") end},

},

{"Negative Colour:",

{"Red", function() choosecolour("neg","red") end},

{"Yellow", function() choosecolour("neg","yellow") end},

{"Blue", function() choosecolour("neg","blue") end},

{"Black", function() choosecolour("neg","black") end},

{"Green", function() choosecolour("neg","green") end},

{"White", function() choosecolour("neg","white") end},

},

}

toolpalette.register(menu)

This code snippet can be placed at the very end of the script, but it does assume that the various colors have been defined, probably at the start, using a table like the one that follows.

Color = {

red = {255, 0, 0},

orange = {255, 165, 0},

yellow = {255, 255, 0},

green = {0, 255, 0},

blue = {0, 0, 255},

white = {255, 255, 255},

black = {0, 0, 0},

paleblue = {200, 200, 240},

navy = {20, 20, 138},

maroon = {150, 50, 50},

gray = {120, 120, 120}

}


This menu example is illustrated using the algebra tiles document which accompanies this lesson - based squarely upon Marc's excellent Integer Addition and Subtraction document.

Thanks to Marc for pointing out to me that Andy Kemp has used this menu routine in quite a different way in his documents - and, of course, thanks to Andy for being a genius. You will see as follows that variables can be defined very neatly using this approach. Here, if the choice is for, say 12 coins, then they will be set out using columns of 3 and rows of 4. In this way, menus can be a real time saver when varying scripts.

menu={

{"Coins",

{"1 coin", function() cols=1 rows=1 coins=1 on.create() end},

{"2 coins", function() cols=1 rows=2 coins=2 on.create() end},

{"3 coins", function() cols=2 rows=2 coins=3 on.create() end},

{"4 coins", function() cols=2 rows=2 coins=4 on.create() end},

{"5 coins", function() cols=3 rows=3 coins=5 on.create() end},

{"6 coins", function() cols=3 rows=3 coins=6 on.create() end},

{"7 coins", function() cols=3 rows=3 coins=7 on.create() end},

{"8 coins", function() cols=3 rows=3 coins=8 on.create() end},

{"9 coins", function() cols=3 rows=3 coins=9 on.create() end},

{"10 coins", function() cols=3 rows=4 coins=10 on.create() end},

{"11 coins", function() cols=3 rows=4 coins=11 on.create() end},

{"12 coins", function() cols=3 rows=4 coins=12 on.create() end},

},

{"About",

{"About", function() about=1 platform.window:invalidate() end},

},

}

}

toolpalette.register(menu)

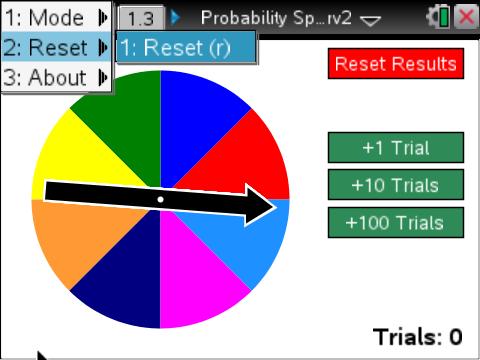
Possibly even neater is Andy's spinner variations - note the use of the menu to call the enterKey action?

menu={

{"Mode",

{"Slow (s)", function() mode="slow" on.enterKey() end},

{"Fast (f)", function() mode="fast" on.enterKey() end},

{"Very Fast (v)", function() mode="veryfast" on.enterKey() end},

},

{"Reset",

{"Reset (r)", function() resetresults() end},

},

{"About",

{"About", function() about=1 platform.window:invalidate() end},

}

}

toolpalette.register(menu)

Andy points out that you cannot have a "top level" menu item - each menu item must reside in a sub-menu, which is a bit restrictive, but no real problem. His other word of advice? Pay attention to closing off all brackets and braces, and watch your commas!

The next two lessons represent a change of pace - consideration of some useful guidelines for creating consistent and usable documents using Lua on the TI-Nspire platform.


Back to Top


Home TI-Nspire Authoring TI-Nspire Scripting HQ Scripting Tutorial - Lesson 18