Home ← TI-Nspire Authoring ← TI-Nspire Scripting HQ ← Scripting Tutorial - Lesson 23
Scripting Tutorial - Lesson 23: (3.2) Welcome to the Physics Engine!
Download supporting files for this tutorial
Download this page in PDF format
Texas Instruments TI-Nspire Scripting Support Page
|
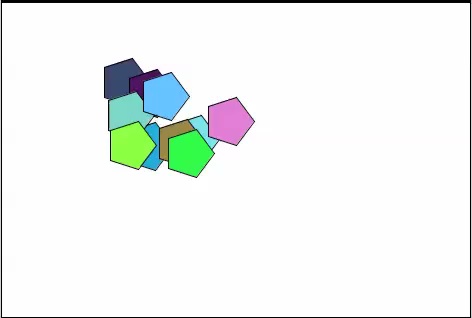
Probably the most dramatic addition to TI-Nspire's Lua capabilities (and possibly to the entire TI-Nspire platform) accompanying the 3.2 update lies in the new Lua Physics Engine. Based upon the open-source 2D physics Chipmunk engine, this new library adds enormously powerful simulation capabilities. Tools are provided to model not only objects moving under different forces, but a huge range of modelling possibilities for mechanics, physics and much more. As with everything that has gone before, it takes a very experienced programmer to get the most out of this new feature set. Nonetheless, there is still much that amateurs (like me) can explore and make good use of. These last few lessons in our series offer some basic insights and direction in getting started with the Nspire Lua Chipmunk Physics Engine. For a glimpse of where I plan to end up, have a look at the accompanying movie (developed by Alfredo Rodriguez from TI). |
|
|
1. Getting Started with the Physics Engine Our first Chipmunk project will, naturally, be less ambitious than the dazzling display above. We will begin by sending a single ball bouncing around the screen. You might (correctly) observe that this can be achieved without the need for a physics engine - the magic of the timer can get things moving without too much trouble, and we could create a circle class that has its location controlled by the timer. So what does this Physics Engine offer that makes it worth all the hype? You may remember when we first encountered classes, and the powerful realization that these objects "knew" where they were on the screen. This opens all sorts of doors and makes many things, which might otherwise be very complicated, much simpler. So it is with Chipmunk. Like classes, we define objects (and these objects exist within a "space") but the key lies in the attributes that these objects may possess - they possess a body and a shape (the part we see), both of which carry attributes, from simple things like mass, and gravity, and velocity to more interesting things like moments of inertia (the tendency of a body to turn or spin while moving) right through to friction and elasticity, and support for collisions, damped rotary springs, pivot and ratchet joints and simple motors. Let me be clear at the outset that I do not plan to be your guide to all of these far off and exotic places - but we will learn enough about things closer to home to get you started, and from there - well, that is up to you. |
|
|
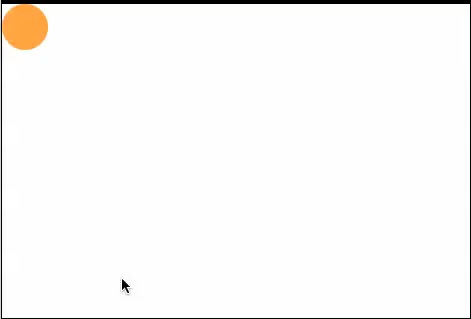
2. Quick Start: Getting a Ball Bouncing If you have not already done so, copy the script from your browser window and paste it into the TI-Nspire Script Editor, Set it by pressing ctrl-s and enjoy the show. You should see a blue circle bouncing around the screen. Since the physics engine is a feature only available in OS 3.2, then the APILevel must be set to 2.0. Critically important in 3.2 is the new require command which currently supports a couple of options - require "physics" (which provides access to the physics library) and require "color" (which provides access to a library of pre-defined basic colours). Here we focus on the first of these, but will demonstrate the second later. Next we define the space in which our body will live - an essential part of the physics world. Within this space, we will later define such things as gravity but for now, gravity will be assumed to be 0. Most importantly, we define the body that our object will occupy. Note that this has no visual element - think of it as an empty shell which possesses attributes, and which will eventually require a shape in which it can be cloaked (the shape may also carry with it attributes such as elasticity (properly called restitution in this physics world) and friction - more on that later). The physics.Body command takes two inputs - mass (here set as 100) and inertia, set as 0. Change these values and see the effect. Now we define the velocity of our body. Velocity (like position and quite a few other physics commands) takes as its argument a vector, which makes sense when you think about it since a vector carries both direction and magnitude, measured initially from the origin. So when we define velocity as newBody:setVel(physics.Vect(1000,1000)) imagine a vector from (0, 0) to the point (1000, 1000) which gives both the initial direction of motion (45 degrees down from the horizontal), and the speed as the length of the vector. The initial position is set by default as (0, 0). Finally, for the physics part, we add this body to our space: space:addBody(newBody). It is now defined and ready to be used. Things like position and velocity, of course, can be changed at any point, which is what we do in our on.paint function. 3. Painting the Visuals and the Action Most of what appears in the on.paint function should actually make sense if you have worked through the previous lessons. Define the window dimensions and then assign simple names to the attributes of our body - not just position and velocity, but x and y components of these - all taken care of when we defined our body previously. See how this can make our lives easier when controlling this body? In fact, the key element supported by the physics engine that did not exist in any practical way previously is that of velocity. While we could use the timer to change the position of an object, and control the speed of this change by jumping more quickly, there was no real way to control the actual speed and direction which is true velocity. This is powerfully important for simulations of all sorts. Restrict the movement of our body - if it hits any of the screen boundaries, it gets reflected/bounced off in the usual way - and then redefine both position and velocity (setPos and setVel) in terms of these new coordinates. Again, you may need to study what is happening here closely to understand it. Take the time you need. Finally, give the body a shape - in this case, a blue circle which simply follows the location of the body as it moves around the screen. Clearly we could use any shape we liked, or even an image here, as long as we set its position to posX and posY. 5. Kick Starting the Show Get the timer defined (note the nice space:step command), refresh the screen as required, and we are done. By placing the initial conditions within a resize function, these will be called when the page is first created and whenever it is resized. Resizing the window will start everything over again, but ensure that the window size is accounted for. [Note: there appears to be a bug in the timer.start command at present. If called once, it functions correctly; if called again, it actually stops the timer until re-called. For this reason, it is not placed inside the on.resize function but instead is placed at the beginning of the script, where it will be called just once.] |
platform.apilevel = "2.0" require "physics" timer.start(0.01) function on.resize() platform.window:width() H = platform.window:height()space = physics.Space()newBody = physics.Body(100, 0)newBody: setVel(physics.Vect(1000,1000))space: addBody(newBody)end pos() local vel = newBody: vel()local velX = vel: x()local velY = vel: y()local posX = pos: x()local posY = pos: y()if posX > W then math.abs(velX) posX = W elseif posX < 0 then math.abs(velX) posX = 0 end if posY > H then math.abs(velY) posY = H elseif posY < 0 then math.abs(velY) posY = 0 end setPos( physics.Vect(posX, posY) ) newBody: setVel( physics.Vect(velX, velY) ) gc:setColorRGB(0, 0, 255) gc:fillArc(posX, posY, width, width, 0, 360)end on.timer() step(0.01) platform.window:invalidate() end |
Now, as usual comes the fun part, where you get to play around.
I would suggest that you begin with the initial velocity - try varying the vector and see the effects. What if, instead of (1000, 1000), we began with (1000, 0) - before you run it, think: what do YOU think the effect will be? What about (-100, -100)? Why?
You may want to try a new starting position. Add the window size definitions for w and h to the resize function (just copy and paste them from on.paint) and, after the setVel line, add something like newBody:setPos(physics.Vect(w/2,h/2)).
Can you make the ball begin in the bottom right corner?
Do you notice that our ball bounces correctly from the left and top of the screen, but runs over on the right and bottom? How could you adjust for this so that it bounces correctly from all four walls?
How about a square instead of a circle?
The document chipmunk_simple.tns included for download with this lesson includes answers to each of these questions. In the next lesson we revisit these key ideas but in a more detailed and sustainable way.
Home ← TI-Nspire Authoring ← TI-Nspire Scripting HQ ← Scripting Tutorial - Lesson 23


